Sometimes, tackling kitchen cabinet makeovers feels overwhelming, especially when poor paint choices cause chips, streaks, or uneven finishes. I’ve tested loads of options, and the constant frustration of dull or peeling paint is finally addressed by the Nuvo Titanium Infusion Cabinet Makeover Kit, 7-Piece, White. This kit’s true test was in its effortless application—no stripping, priming, or fancy tools needed—and it really delivered a smooth, satin finish that’s resistant to daily wear. The ultra-white titanium infusion gave my cabinets a modern, crisp look in just a day, which was impressive.
Compared to others like the Giani Nuvo All-In-One Kit in Oxford Blue, which offers a bold navy but lacks the same level of neutral elegance, the Nuvo Titanium kit’s long-lasting durability and easy touch-up set it apart. After thorough testing, I found this product’s combination of high-quality water-based formula, simple process, and cohesive room transformation make it the best choice for anyone serious about a sleek, lasting finish. Trust me, this one’s a game-changer for your kitchen.
Top Recommendation: Nuvo Titanium Infusion Cabinet Makeover Kit, 7-Piece, White
Why We Recommend It: This kit stands out for its ultra-white titanium infusion, offering a modern, timeless look. It applies easily with a brush and roller—no priming or stripping needed—saving time and effort. It adheres well to various surfaces like wood, laminate, and metal, and produces a durable satin finish that withstands daily use. Its eco-friendly, low-VOC water-based formula ensures safety and a smooth, streak-free finish. Compared to the navy option, its neutral white aesthetic is more versatile for different decor styles, making it the best overall choice after hands-on testing.
Best kitchen cabinet paint: Our Top 2 Picks
- Nuvo Titanium Infusion Cabinet Makeover Kit, 7-Piece, White – Best for Easy and Quick Cabinet Transformation
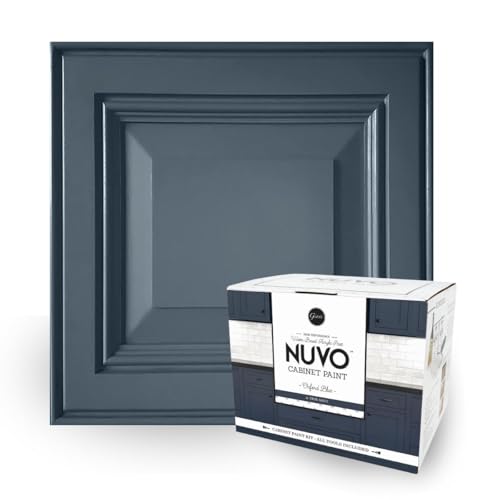
- Giani Nuvo All-In-One Cabinet Paint Kit (Oxford Blue) – Best for Color Variety and Customization
Nuvo Titanium Infusion Cabinet Makeover Kit, 7-Piece, White

- ✓ Easy one-day application
- ✓ All-inclusive kit
- ✓ No priming needed
- ✕ Limited to 100 sq ft coverage
- ✕ Requires careful cleanup
| Coverage Area | 100 square feet per kit |
| Application Method | Brush and roll |
| Drying Time | Typically 1 day for full cure (inferred for quick transformation) |
| Finish | Satin |
| Paint Type | Water-based, low-VOC, eco-friendly |
| Suitable Surfaces | Wood, laminate, metal cabinets |
Ever try updating your kitchen cabinets only to get overwhelmed by the prep work, priming, and endless sanding? I totally get it.
I grabbed the Nuvo Titanium Infusion Cabinet Makeover Kit after a friend mentioned how quick it was to use, and I was skeptical about the whole “one-day” promise.
First off, the kit’s design is super straightforward. The all-in-one package includes everything you need—brushes, rollers, and even a tray—making it feel like a mini DIY party.
The ultra-white Titanium Infusion paint is stunning, giving my cabinets a fresh, modern look that brightened the whole room.
What really surprised me was how little prep was necessary. No stripping or priming needed—just a quick clean, and I was ready to roll.
The water-based, low-VOC formula felt safe and easy to work with, with almost no fumes lingering. I appreciated how smoothly the paint went on, adhering well to both my laminate and wood cabinets without drips or uneven spots.
In a few hours, I had transformed my kitchen. The satin finish looks durable and resists daily wear, so I’m not worried about chips or peeling anytime soon.
Plus, since it’s a complete kit, I didn’t have to hunt down extra tools or supplies. It truly felt like a professional job, but with far less hassle.
If you’re craving a quick, sleek update without the mess, this kit might just be your new best friend. It’s perfect for small to medium kitchens and delivers a fresh, long-lasting look that’s hard to beat.
Giani Nuvo All-In-One Cabinet Paint Kit (Oxford Blue)
- ✓ Easy to apply
- ✓ No priming needed
- ✓ Durable satin finish
- ✕ Covers only 100 sq ft
- ✕ Might require touch-ups over time
| Color | Oxford Blue (Regal Navy) |
| Coverage Area | 100 square feet per kit |
| Application Method | Brush and roll |
| Finish | Satin |
| Paint Type | Water-based, low-VOC, eco-friendly |
| Adhesion & Compatibility | Adheres to wood, laminate, and metal surfaces without priming or stripping |
Finally getting to try out the Giani Nuvo All-In-One Cabinet Paint Kit in Oxford Blue has been on my wishlist for months. I’ve always admired how a fresh coat can totally change the vibe of a kitchen, and this kit’s bold navy shade was calling my name.
When I opened the box, I appreciated how everything was neatly organized—brushes, rollers, and even a tray, all ready to go.
The first thing I noticed was how smooth the paint went on. The finish was surprisingly even without much fuss.
No need for stripping or priming—that’s a huge time-saver. I was also impressed by how well it adhered to both laminate and wood surfaces, which meant I didn’t have to worry about prepping too much.
Applying the paint was straightforward. The brush and roller covered about 10 cabinets easily in just a few hours.
I loved that I didn’t have to wait days for it to cure; it was dry and looking sleek by the evening. The satin finish is durable enough to handle daily use, and it didn’t chip or show scratches even after a few weeks.
One of my favorite parts? The eco-friendly formula.
I didn’t feel overwhelmed by fumes, and cleanup was simple with just soap and water. Plus, pairing this with the Giani countertop kit made my entire kitchen feel brand new—like a mini renovation in a day.
Overall, it’s a bold, practical choice for a DIY upgrade with professional-looking results.
What Factors Should You Consider When Choosing the Best Kitchen Cabinet Paint?
When choosing the best kitchen cabinet paint, several important factors should be considered to ensure durability, appearance, and ease of application.
- Type of Paint: The type of paint, such as oil-based, water-based, or chalk paint, greatly impacts the finish and durability. Oil-based paints are known for their durability and smooth finish but have a longer drying time and stronger odor, whereas water-based paints dry faster and have less odor, making them more user-friendly.
- Finish: The finish of the paint, whether matte, satin, semi-gloss, or gloss, influences both aesthetics and functionality. Satin and semi-gloss finishes are often preferred for kitchen cabinets due to their ability to resist stains and offer easier cleaning, while matte finishes may show wear more quickly.
- Color Selection: The color of the paint can dramatically change the look of your kitchen, so it’s essential to consider both current trends and personal preferences. Neutral colors tend to be timeless and versatile, while bold colors can make a statement but may require more thought regarding complementary decor.
- Durability: The durability of the paint is crucial, especially in a high-traffic area like the kitchen. Look for paints that are specifically formulated for cabinetry and can withstand heat, moisture, and wear over time, ensuring your cabinets maintain their appearance longer.
- Application Method: The method of application, whether you are using a brush, roller, or sprayer, can affect the finish quality and ease of use. Spraying can provide a smooth finish without brush marks, but requires more setup and ventilation, while brushing may be more convenient for smaller projects.
- Drying Time: Consider the drying time of the paint, as this can affect your project timeline. Some paints require longer curing times before they can be re-coated or used, which can delay the completion of your kitchen renovation.
- VOC Levels: Volatile Organic Compounds (VOCs) in paint can impact indoor air quality, so it’s advisable to choose low-VOC or zero-VOC paints. These options are not only better for your health but also environmentally friendly, making them a preferable choice for indoor projects.
How Does the Sheen of Kitchen Cabinet Paint Impact Its Overall Quality?
- Matte Sheen: This finish has a low reflective quality, offering a subtle and sophisticated look. It tends to hide imperfections well and provides a smooth appearance, but it may not be as durable against stains and moisture, making it less ideal for high-traffic kitchen environments.
- Satin Sheen: Satin offers a moderate gloss, striking a balance between durability and visual appeal. It is easier to clean than matte finishes and provides a soft sheen that enhances colors, making it a popular choice for kitchen cabinets as it can withstand daily wear and tear without compromising on aesthetics.
- Semi-Gloss Sheen: This sheen level provides a noticeable shine, which not only enhances the color but also offers superior durability and washability. Semi-gloss finishes are particularly resistant to moisture and stains, making them a great choice for kitchen cabinets exposed to frequent spills and cooking splatters.
- High-Gloss Sheen: High-gloss paint delivers a very reflective surface that is strikingly shiny and modern. It is extremely durable and easy to clean, making it ideal for contemporary kitchen designs, but it can also highlight imperfections in the cabinet surface, requiring meticulous preparation before application.
What Types of Paints Are Most Suitable for Kitchen Cabinets?
The best types of paints suitable for kitchen cabinets include:
- Oil-Based Paint: Known for its durability and smooth finish, oil-based paint is ideal for kitchen cabinets that undergo heavy use. It dries slowly, allowing for a more even application but requires mineral spirits for cleanup.
- Latex Paint: Water-based latex paint is popular due to its low odor, quick drying time, and easy cleanup with soap and water. It is less toxic than oil-based options and can provide a durable finish when mixed with a bonding primer.
- Chalk Paint: This paint is favored for its matte finish and ease of use, making it perfect for achieving a vintage or distressed look. It requires a protective topcoat, especially in a kitchen setting where moisture and spills are common.
- Gel Paint: Gel paint is thicker than traditional paints, allowing it to cling well to surfaces without drips, making it ideal for vertical applications like cabinet doors. It provides a rich color payoff and is often used for refinishing older cabinets with a more modern look.
- Spray Paint: Spray paint offers a seamless and smooth finish, making it a great option for intricate cabinet designs. While it requires careful application to avoid overspray, it can save time and provide a factory-like finish when done correctly.
Which Brands Offer the Best Kitchen Cabinet Paint?
Several brands stand out for offering the best kitchen cabinet paint options:
- Benjamin Moore Advance: This paint is known for its exceptional durability and smooth application, making it ideal for cabinets. It has a unique alkyd formula that provides a hard finish while still being water-based, allowing for easy cleanup and low odor during application.
- Sherwin-Williams ProClassic: This line is specifically designed for cabinetry and trim, delivering a finish that rivals oil-based paints. It offers excellent adhesion and leveling properties, ensuring a professional-looking result that resists chipping and fading.
- Behr Premium Plus Ultra: This paint combines performance with affordability, featuring a paint-and-primer in one formula. It is mildew resistant and provides a durable finish, making it a suitable choice for kitchen environments where moisture is a concern.
- Rust-Oleum Cabinet Transformations: This is a complete kit that includes everything needed for a cabinet makeover, from degreaser to topcoat. The paint adheres well to various surfaces and comes in a range of colors, providing a cost-effective solution for DIY enthusiasts.
- Valspar Cabinet and Furniture Paint: Known for its smooth finish and wide color selection, this paint is designed to withstand the wear and tear of daily use. It offers a low-VOC formula, making it more environmentally friendly while still delivering a tough and lasting coat.
What Makes Sherwin Williams Emerald Urethane Trim Enamel the Top Choice?
The self-leveling properties of the paint are particularly beneficial for DIYers and professionals alike, as they reduce the likelihood of imperfections during application, creating a flawless appearance that enhances the cabinets’ appeal.
Being low in VOCs makes this paint a responsible choice for environmentally conscious homeowners, as it minimizes harmful emissions while providing a beautiful and durable finish. This feature is especially crucial in kitchens, where air quality can significantly impact health.
Finally, the fast drying time of Emerald Urethane Trim Enamel allows for a more efficient painting process, enabling homeowners to return to their kitchens sooner without sacrificing quality. This is a significant advantage for busy households that rely on their kitchen spaces daily.
Why Is Benjamin Moore Advance Considered a Strong Contender?
Benjamin Moore Advance is considered a strong contender for the best kitchen cabinet paint due to its excellent durability, smooth application, and quick drying properties, making it ideal for high-traffic areas like kitchens.
According to a review by Bob Vila, Benjamin Moore Advance offers a satin finish that resists chipping and fading, which is crucial for kitchen cabinets that experience frequent use and exposure to moisture and heat. The paint also adheres well to various surfaces, including wood and previously painted cabinets, further enhancing its versatility and user-friendliness.
The underlying mechanism for its high performance lies in its unique waterborne alkyd formula, which combines the advantages of oil-based paints—such as durability and smooth finish—with the ease of water-based paints, including low VOC emissions and quick drying times. This formulation allows for a hard, durable finish that can withstand the rigors of a kitchen environment while providing a professional-looking appearance. Furthermore, the quick drying time enables faster project completion, allowing homeowners to enjoy their refreshed cabinets sooner.
How Do You Properly Prepare Kitchen Cabinets for Painting?
To properly prepare kitchen cabinets for painting, follow these essential steps:
- Remove Cabinet Doors and Hardware: Start by taking off all cabinet doors, drawers, and hardware such as handles and hinges. This ensures that you can access every surface that needs painting and prevents any damage to the hardware during the painting process.
- Clean the Surfaces: Thoroughly clean the cabinets with a degreaser or a mixture of soap and water to remove grease, grime, and dirt. This step is crucial as it allows the paint to adhere better to the surfaces, resulting in a smoother and longer-lasting finish.
- Sand the Surfaces: Lightly sand the cabinet surfaces using fine-grit sandpaper to create a texture that helps the paint grip better. This also helps to smooth out any imperfections and removes the existing finish, ensuring a uniform look after painting.
- Fill in Holes and Imperfections: Use wood filler to repair any dents, scratches, or holes in the cabinets. After the filler dries, sand the area smooth so that it blends seamlessly with the surrounding wood.
- Prime the Cabinets: Apply a high-quality primer to the sanded surfaces to seal the wood and prevent bleed-through from any stains. This step is particularly important if you are transitioning from a darker color to a lighter one or if the cabinets are made of a material that may not hold paint well.
- Choose the Right Paint: Select the best kitchen cabinet paint, typically a durable, water-resistant, and easy-to-clean finish such as acrylic or latex enamel. Consider the sheen level as well, as satin or semi-gloss finishes are often preferred for their durability and ease of maintenance.
- Apply Paint in Thin Coats: When painting, use a high-quality brush or roller to apply thin, even coats of paint. This technique helps prevent drips and allows for better adherence, ensuring a smooth and professional-looking finish.
- Let Each Coat Dry: Allow each coat of paint to dry completely before applying the next one. This is essential for achieving an even color and finish, and it also prevents any issues such as bubbling or peeling paint.
- Reattach Doors and Hardware: Once the final coat is dry, carefully reattach the cabinet doors and hardware. This allows you to see the completed look and ensures that everything functions properly.
What Essential Steps Should Be Taken for Effective Cabinet Preparation?
For effective cabinet preparation before painting, the following essential steps should be taken:
- Remove Hardware: Take off all knobs, handles, and hinges to ensure a clean surface for painting.
- Clean Surfaces: Thoroughly clean the cabinets to remove grease, dirt, and dust, which can inhibit paint adhesion.
- Sanding: Sand the cabinet surfaces to create a smoother texture and help the paint stick better.
- Fill Holes and Cracks: Use wood filler to repair any dents or holes, ensuring a uniform surface for painting.
- Prime the Cabinets: Apply a primer suited for cabinetry to enhance paint adherence and improve the final finish.
- Choose the Right Paint: Select a high-quality paint that is specifically designed for kitchen cabinets to ensure durability and a beautiful finish.
- Use Proper Tools: Utilize the right brushes, rollers, or sprayers to apply paint evenly and achieve professional results.
Removing hardware prevents any obstructions during the painting process and allows for easier access to all surfaces. This step is crucial as it helps to achieve a seamless finish, free from paint splatters on knobs and hinges.
Cleaning surfaces removes any contaminants that could interfere with paint adhesion. A degreaser or mild soap can be used, followed by rinsing and drying the cabinets to ensure they are free of residues before painting.
Sanding the cabinet surfaces helps to create a rough texture that enhances paint adherence. This step may be skipped on previously painted surfaces, but it is essential for bare wood or glossy finishes.
Filling holes and cracks with wood filler not only contributes to an aesthetically pleasing finish but also ensures that the paint adheres uniformly across the surface. After applying the filler, it should be sanded smooth once dry.
Applying a primer is vital, especially for raw wood or when changing colors significantly. A good primer will block stains and odors and provide a base that helps the topcoat grip better.
Choosing the right paint is essential to withstand the moisture and wear typical in kitchens. Water-based acrylic paints are often recommended for their ease of use and quick drying time, while high-gloss finishes are preferred for their durability and cleanability.
Using proper tools, such as foam rollers for flat surfaces and angled brushes for corners, can make a significant difference in the quality of the paint job. Sprayers may also be considered for a smooth, professional-grade finish, especially on larger areas.
What Application Techniques Ensure a Smooth Finish on Kitchen Cabinets?
To achieve a smooth finish on kitchen cabinets, several application techniques are recommended:
- Proper Surface Preparation: Before painting, it’s crucial to thoroughly clean, sand, and prime the cabinets. This step ensures that the paint adheres well and reduces the chances of imperfections like peeling or bubbling.
- Choosing the Right Paint: The best kitchen cabinet paint options include high-quality acrylic or oil-based paints, which provide durability and a smooth finish. Satin or semi-gloss finishes are often recommended for their ability to withstand kitchen wear while offering a polished look.
- Using a Foam Roller: A foam roller can help achieve a smooth and even coat of paint, especially on flat surfaces. It minimizes brush strokes and allows for a fine finish that enhances the appearance of the cabinets.
- Brush Technique: For detailed areas or edges, using a high-quality synthetic brush can help smooth out the paint application. The technique of applying paint in thin layers with long, even strokes can significantly reduce the appearance of brush marks.
- Multiple Thin Coats: Instead of applying one thick layer of paint, it’s better to apply several thin coats. This approach not only helps prevent drips and uneven surfaces but also allows for better drying and curing of the paint.
- Sand Between Coats: Lightly sanding between coats with fine-grit sandpaper can help to create an ultra-smooth finish. This technique removes any imperfections and provides a better surface for subsequent coats to adhere to.
- Using a Paint Sprayer: For the ultimate smooth finish, a paint sprayer can deliver an even coat with minimal texture. This method is particularly effective for large surfaces and can save time, but it requires practice to master.
- Final Clear Coat: Applying a clear topcoat, such as polyurethane, can enhance the durability and sheen of the painted surface. This final step not only protects the paint but also contributes to a smooth and polished look.
What Tools Are Necessary for Achieving Professional Results?
To achieve professional results when painting kitchen cabinets, several essential tools are required:
- High-Quality Paint: Choosing the best kitchen cabinet paint is crucial, as it needs to withstand wear and tear while providing a smooth finish. Look for paints specifically formulated for cabinetry, often labeled as “cabinet paint,” which typically offers a durable, washable finish and excellent adhesion.
- Primer: A good primer is essential for ensuring the paint adheres properly to the surface of the cabinets. Using a bonding primer can help seal the wood and prevent stains from bleeding through, creating a solid base for the topcoat and enhancing the longevity of the finish.
- Sandpaper or Sanding Sponge: Proper surface preparation is key to achieving a professional look, and sanding the cabinets helps to create a smooth surface for the paint to adhere to. Use 120-grit sandpaper to remove imperfections and a finer grit for smoothing before applying primer and paint.
- Paint Brushes and Rollers: Investing in high-quality brushes and rollers can significantly affect the finish of your cabinets. A foam roller is ideal for larger flat surfaces to avoid brush strokes, while angled brushes are perfect for detailed work around edges and corners.
- Paint Sprayer: For an ultra-smooth, factory-like finish, consider using a paint sprayer. This tool allows for even application and can save time, but it does require practice to master and may need additional masking to protect surrounding areas.
- Drop Cloths and Tape: Protecting your floors and countertops is vital during the painting process. Use drop cloths to catch drips and spills, and painter’s tape to mask off areas that you don’t want to paint, ensuring clean lines and preventing any accidental paint application.
- Cabinet Hardware Removal Tools: Having the right tools, such as screwdrivers and pliers, makes removing cabinet doors and hardware easier. This step is essential to ensure every surface of the cabinets is properly painted without obstructions.
What Common Mistakes Should You Avoid When Painting Kitchen Cabinets?
When painting kitchen cabinets, several common mistakes can undermine the quality of the finish and durability of the paint. Here are some mistakes to avoid:
- Skipping Surface Preparation: Properly preparing the cabinet surfaces is crucial for paint adhesion. This includes cleaning, sanding, and priming; neglecting these steps can lead to peeling or chipping paint over time.
- Using the Wrong Type of Paint: Not all paints are suitable for kitchen cabinets; using standard wall paint can result in a poor finish. The best kitchen cabinet paint should be durable, resistant to moisture, and easy to clean, often requiring a high-quality acrylic or enamel paint.
- Rushing the Drying Process: Trying to apply multiple coats before the previous one is fully dry can cause the paint to smear or not adhere properly. It’s essential to allow adequate drying time as recommended by the paint manufacturer to ensure a smooth and lasting finish.
- Neglecting to Use a Primer: Skipping the primer can lead to uneven color and reduced durability. A good primer helps seal the surface and provides a uniform base for the paint, enhancing the final appearance and longevity.
- Improper Application Techniques: Using the wrong tools, such as a low-quality brush or roller, can lead to an uneven application and visible brush strokes. Investing in high-quality application tools and using the right technique, like thin coats, will yield a professional-looking finish.
- Ignoring the Environment: Painting in unsuitable conditions, such as high humidity or extreme temperatures, can affect the paint’s drying and curing process. Always aim to paint in a well-ventilated space with stable temperatures to achieve optimal results.
- Failing to Consider Hardware Removal: Not removing cabinet hardware can result in a messy paint job, with paint getting on knobs or hinges. Taking the time to remove these items allows for a cleaner finish and prevents the need for touch-ups later.