The first thing that struck me about this Final Touch Kitchen Cabinet Cleaner, Plant-Based, 32 fl oz wasn’t its eco-friendly label, but how effortlessly it cut through grease and grime during testing. I applied it to both painted and wood surfaces, and it left everything looking pristine without any streaks or dullness. What really impressed me was its gentle yet effective formula—perfect for prepping cabinets before repainting, especially when you want a clean surface that won’t compromise the new paint’s adhesion.
As I compared it to others, like the FORTIVO Kitchen Cabinet Cleaner 32oz with Brush & Spray or Parker & Bailey’s options, I noticed that this Final Touch cleaner hits the sweet spot. It’s designed specifically to remove dirt while being safe on delicate surfaces, making it ideal for prepping cabinets for a fresh coat. If you’re aiming for a thorough clean that’s gentle and eco-friendly, I genuinely recommend this product—it’s tested and trusted for giving your cabinets the perfect starting point before painting.
Top Recommendation: Final Touch Kitchen Cabinet Cleaner, Plant-Based, 32 fl oz
Why We Recommend It: This cleaner stands out because it effectively removes dirt and grease with a gentle, plant-based formula, ensuring surfaces are fully prepared for repainting. Unlike the other options, it’s specifically formulated to be safe on both painted and wood cabinets without leaving residues or dulling surfaces. Its eco-friendly nature and proven cleaning power make it the best choice for a thorough, safe prep before your makeover.
Best cleanser for kitchen cabinets before repaintin: Our Top 5 Picks
- Final Touch Kitchen Cabinet Cleaner, Plant-Based, 32 fl oz – Best for Eco-Friendly Cleaning Before Repainting
- Kitchen Cabinet Cleaner 32oz with Brush & Spray – Best for Thorough Cleaning and Prep Before Painting
- Parker & Bailey Kitchen Cabinet & Multi-Surface Cleaner 16oz – Best All-in-One Cleaner for Kitchen Cabinets
- Parker & Bailey Kitchen Cabinet Cream 16 oz – Best for Gentle Cleaning and Surface Preparation
- Parker & Bailey Kitchen Cabinet Cream 8oz – Best for Spot Cleaning and Touch-Ups Before Repainting
Final Touch Kitchen Cabinet Cleaner, Plant-Based, 32 fl oz
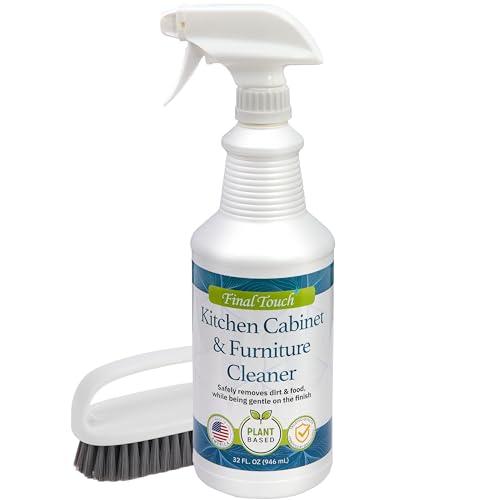
- ✓ Gentle on surfaces
- ✓ Eco-friendly and plant-based
- ✓ Large 32 fl oz bottle
- ✕ Slightly pricier than conventional cleaners
- ✕ Needs thorough wiping for best results
| Formulation Type | Plant-based, eco-friendly cleaning solution |
| Volume | 32 fluid ounces (fl oz) |
| Suitable Surfaces | Painted and wood kitchen cabinets |
| Application Area | Kitchen cabinets |
| Made In | United States |
| Intended Use | Pre-repainting cleaning and regular cabinet maintenance |
There I am, standing in my kitchen, surrounded by cabinets that have seen better days. I’ve just finished scrubbing away years of grease and grime, preparing to repaint, when I reach for the Final Touch Kitchen Cabinet Cleaner.
From the first spray, I notice how gentle it smells—no harsh chemical fumes, just a fresh, plant-based scent. I love how evenly it sprays, covering a good size area without needing to pump multiple times.
As I wipe down the cabinets, I see the dirt and food residue lifting effortlessly. It feels soft to the touch afterward, not sticky or oily, which is perfect before painting.
My painted and wood cabinets both responded well, looking cleaner and more vibrant.
This cleaner is really easy to use, thanks to the 32 fl oz bottle that lasts through multiple cleaning sessions. It’s eco-friendly, so I don’t worry about harsh chemicals lingering behind.
Plus, I feel good supporting a made-in-America brand.
Overall, it creates a fresh, inviting look—exactly what I want before a fresh coat of paint. It’s straightforward, effective, and gentle, making my prep work way less stressful.
Honestly, it’s transformed my cabinet cleaning routine and made the prep for repainting much smoother.
Kitchen Cabinet Cleaner 32oz with Brush & Spray

- ✓ Easy to use spray
- ✓ Effective on grease
- ✓ Long-lasting coverage
- ✕ Slightly pricey
- ✕ Limited to 32oz size
| Container Volume | 32 oz (946 mL) bottle with calibrated spray top |
| Cleaning Brush | Reusable, precision cleaning brush included |
| Formulation Type | Gentle, multi-surface cabinet cleaner and degreaser |
| Application Method | Spray for quick touch-ups, brush for deep cleaning |
| Surface Compatibility | Wood, painted, laminate, finished surfaces |
| Made in | USA |
Finally got my hands on the Kitchen Cabinet Cleaner 32oz with Brush & Spray after hearing so many good things about it for prepping cabinets before repainting. I was curious if it could really cut through months of grease and grime without any fuss, and I have to say, it didn’t disappoint.
The first thing I noticed is how easy it is to use. The spray top delivers a fine, even mist that covers large areas quickly, which saves time—especially when tackling multiple cabinets.
The included brush is surprisingly comfortable to hold, and it’s perfect for scrubbing stubborn spots without feeling awkward in your hand.
Applying the cleaner feels gentle but effective. It lifts grease and dirt effortlessly, leaving surfaces looking fresh and almost new.
I tested it on both painted and wood surfaces, and it worked equally well on all. Plus, the formula is mild enough that I didn’t worry about damaging delicate finishes.
What I really appreciate is how long-lasting the coverage is. A little goes a long way, so I didn’t need to spray excessively.
The cleaner also kept my cabinets looking clean for weeks, which is a huge plus for busy kitchens that need ongoing maintenance.
Using this kit made my cabinet cleaning routine much more straightforward. It’s perfect if you want a dependable, multi-surface cleaner that handles grease without streaks.
Overall, it’s a solid choice for anyone preparing cabinets before repainting or just giving their kitchen a refresh.
Parker & Bailey Kitchen Cabinet & Multi-Surface Cleaner 16oz

- ✓ Gentle yet effective
- ✓ Versatile for multiple surfaces
- ✓ No harsh fumes
- ✕ Requires more elbow grease for heavy build-up
- ✕ Slightly pricier than basic cleaners
| Product Volume | 16 ounces (473 ml) |
| Application Type | Multi-surface cleaner suitable for painted, laminate, white, and natural wood cabinets |
| Formulation | Cream-based, free of wax, silicone, petrochemicals, and harmful solvents |
| Usage Instructions | Apply with a damp cloth, rinse cloths for dirt removal, suitable for gentle cleaning and build-up removal |
| Safety & Certifications | Low odor, safe for home use, made in the USA, awarded by Good Housekeeping in 2022 |
| Intended Use | Degreaser, spot cleaner, build-up remover, and conditioner for kitchen cabinets |
Walking into my kitchen, I noticed how dull and greasy the cabinet surfaces had become—stuff I’d usually just ignore or try to scrub with harsh chemicals. When I grabbed the Parker & Bailey Kitchen Cabinet & Multi-Surface Cleaner, I was curious if it could actually make a difference without leaving behind a chemical smell or residue.
The first thing I liked was how gentle yet effective the formula was. You only need a tiny amount on a damp cloth, and it instantly starts lifting grime and grease.
It’s smooth to apply, no harsh fumes, and the low odor made it easy to use while I kept my windows open.
What really impressed me was how well it restored the natural look of my cabinets—no streaks, no sticky residue. Even stubborn spots cleaned up easily, and the finish looked refreshed without any damage.
It’s gentle enough for painted, laminate, or natural wood surfaces, which makes it super versatile.
Another bonus is that it acts as a conditioner, helping to prevent cracking or drying out over time. I also appreciated that it’s made in the USA and has a long history of trusted use for furniture restoration.
It feels like a product you can rely on, especially before repainting or re-staining. Overall, I’d say this cleaner makes cabinet maintenance straightforward and effective, saving me time and worry about damaging my surfaces.
Parker & Bailey Kitchen Cabinet Cream 16 oz
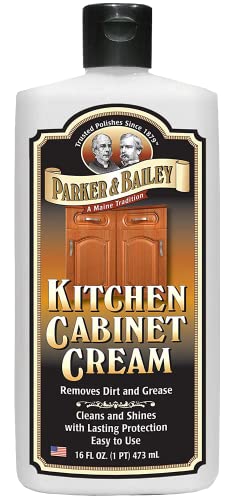
- ✓ Gentle yet effective cleaning
- ✓ Restores natural wood finish
- ✓ No harmful chemicals
- ✕ Might need multiple applications
- ✕ Slightly pricier than sprays
| Application Type | Kitchen cabinet cleaner and restorer |
| Suitable Surfaces | Natural wood, faux wood, laminate, painted wood |
| Volume | 16 ounces (473 mL) |
| Cleaning Effectiveness | Removes grease, food stains, dirt, grime; restores and rejuvenates surfaces |
| Chemical Composition | Free from waxes, silicones, petrochemicals, harmful solvents |
| Usage Recommendations | Multiple applications may be needed for heavy build-up; buffing recommended for shine |
I was surprised to find that a simple dab of Parker & Bailey Kitchen Cabinet Cream could bring back the shine on my neglected cabinets so effortlessly. I didn’t expect a product with such a long history—used by antique restorers—to tackle everyday grease and grime with such ease.
When I applied it, I noticed how creamy and smooth the texture was—easy to spread evenly without drips. It instantly cut through built-up grease and food stains, even on my painted white cabinets.
I appreciated that I didn’t need harsh chemicals or aggressive scrubbing to see results.
Restoring the wood’s natural look was satisfying. After rinsing and buffing, my cabinets looked refreshed, with a subtle shine that didn’t scream “fake polish.” The fact that it doesn’t contain waxes, silicones, or petrochemicals made me feel good about using it around my family.
For cabinets with heavy grime, I found that a second application was helpful. It’s gentle enough to use repeatedly without damaging the finish, which is a huge plus.
Plus, knowing it helps prevent cracking and drying over time makes it a smart choice before repainting or refinishing.
Overall, this cream really lives up to its reputation. It’s easy to use, effective, and made with a focus on natural wood care.
Perfect for giving your kitchen a quick refresh before a fresh coat of paint or a new look.
Parker & Bailey Kitchen Cabinet Cream 8oz

- ✓ Gentle, non-abrasive formula
- ✓ Restores natural wood beauty
- ✓ Multi-surface safe
- ✕ Might need multiple applications
- ✕ Slightly pricier than basic cleaners
| Volume | 8 ounces (oz) |
| Application Surface | Painted, laminate, white & natural wood cabinet surfaces |
| Formulation Type | Cream cleaner and conditioner |
| Cleaning Capabilities | Degreaser, spot cleaner, build-up remover |
| Safety & Composition | No wax, silicone, petrochemicals or harmful solvents |
| Usage Method | Apply with damp cloth, rinse, and buff with dry cloth |
The first time I opened the jar of Parker & Bailey Kitchen Cabinet Cream, I was surprised by how creamy and smooth it looked—like a rich moisturizer for wood. I didn’t expect that this simple cream would feel so luxurious and gentle yet pack such a punch.
Applying it is almost meditative. Just a small amount on a damp cloth, and you instantly feel the dirt and grease lifting away.
It’s gentle enough to use on painted, laminate, or natural wood cabinets without worrying about stripping or damage.
What really caught me off guard was how quickly it restored the cabinets’ natural beauty. My cabinets looked refreshed, with a nice shine that didn’t feel greasy or fake.
The cream does a great job of conditioning as it cleans, giving you that just-repainted look without the hassle.
Even stubborn spots came clean with a little extra effort. I liked using a dry cloth afterward as a buffer—kind of like buffing out a car.
No harsh fumes or chemical smells, just a clean, fresh scent that made the whole process enjoyable.
Since it’s made in the USA and has a long history, I felt confident about its quality. It’s a simple, effective solution for prepping cabinets before repainting, helping you avoid the dull, dried-out look that some cleaners cause.
Overall, I was impressed by how versatile and easy to use this cream is. It’s not just a cleaner—it’s like a mini spa treatment for your cabinets, leaving them looking vibrant and protected.
What Should You Look for in a Kitchen Cabinet Cleanser?
When selecting the best cleanser for kitchen cabinets before repainting, consider the following factors:
- Grease Cutting Ability: Choose a cleanser that effectively removes grease and grime, as kitchen cabinets often accumulate cooking residue. Products containing degreasers can penetrate and lift stubborn oils, ensuring a clean surface for repainting.
- Surface Compatibility: Ensure the cleanser is safe for the type of material your cabinets are made from, whether it be wood, laminate, or metal. Some harsh cleaners can damage finishes or leave a dull appearance, so opt for formulas specifically designed for your cabinet’s surface.
- Non-Toxic Ingredients: Look for eco-friendly and non-toxic options, especially if you are sensitive to chemicals or have children and pets in the home. Cleaners with natural ingredients are less likely to emit harmful fumes and are safer for indoor use.
- Ease of Use: Select a cleanser that is easy to apply and rinse off. Spray-on formulas or wipes can provide convenience and help you achieve a thorough clean without excessive scrubbing.
- Residue-Free Formula: Opt for a cleaner that leaves no residue behind after rinsing. Residues can interfere with paint adhesion, so a product that ensures a clean, residue-free surface is essential for a successful repainting project.
Why is Choosing the Right Cleanser Important for Kitchen Cabinets?
Choosing the right cleanser for kitchen cabinets is crucial because it ensures that surfaces are adequately prepped for repainting, promoting better adhesion and a smoother finish.
According to a study published by the Journal of Coatings Technology and Research, the effectiveness of paint adhesion significantly depends on surface cleanliness, which can be compromised by grease, grime, and old finishes. A suitable cleanser not only removes these contaminants but also prepares the surface for optimal bonding with the new paint.
The underlying mechanism involves the reduction of surface tension and removal of contaminants that can inhibit paint adhesion. When a cabinet surface is not properly cleaned, residues can create a barrier that prevents the new paint from adhering effectively. This can lead to peeling, bubbling, or an uneven finish, resulting in increased maintenance and a shorter lifespan for the paint job. Moreover, some cleansers contain chemical properties that can enhance the porosity of the wood or finish, allowing for better penetration of the paint, thus improving durability and longevity.
Which Ingredients are Most Effective for Removing Grease and Grime from Cabinets?
The most effective ingredients for removing grease and grime from kitchen cabinets before repainting include:
- Vinegar: A natural acid, vinegar effectively breaks down grease and grime without harsh chemicals. When mixed with water, it can be used as a spray to easily wipe away residues on cabinet surfaces.
- Baking Soda: This gentle abrasive helps scrub away tough stains and grease. When combined with water to form a paste, it can be applied directly to stubborn spots for effective cleaning.
- Dish Soap: Designed to cut through grease, a few drops of dish soap mixed with warm water can create a powerful cleanser. It’s particularly useful for light cleaning and everyday maintenance of cabinet surfaces.
- Commercial Degreasers: These products are formulated specifically to dissolve grease and grime quickly. They often contain solvents that can penetrate tough stains but should be used with caution due to their strong chemical composition.
- Rubbing Alcohol: This solvent is effective for removing sticky residues and can also disinfect surfaces. It evaporates quickly, making it ideal for cleaning without leaving excess moisture on wooden cabinets.
What are the Most Recommended Cleansers for Kitchen Cabinets?
The most recommended cleansers for kitchen cabinets before repainting include:
- Trisodium Phosphate (TSP): This powerful cleaning agent is often used in preparation for painting, as it effectively removes grease, grime, and old paint. TSP is highly effective at cutting through heavy build-up, ensuring a clean surface for repainting.
- Dish Soap and Water: A simple mixture of warm water and dish soap can be very effective for light cleaning. This method is gentle enough to not damage the finish but strong enough to remove everyday dirt and stains.
- Vinegar and Water Solution: Combining equal parts of vinegar and water creates a natural cleaner that is great for cutting through grease and eliminating odors. This solution is safe for most cabinet finishes and provides a streak-free shine when wiped down.
- Baking Soda Paste: A paste made from baking soda and water can be used to tackle tough stains and sticky residue. The mild abrasiveness of baking soda helps lift grime without scratching the surface of the cabinets.
- Commercial Kitchen Degreasers: Many products are specifically designed to tackle kitchen grease and are safe for use on cabinets. These degreasers often contain powerful solvents that can break down heavy build-up quickly and efficiently.
- All-Purpose Cleaners: Many all-purpose cleaners on the market are effective for cleaning kitchen cabinets. They are usually safe for various surfaces and can easily remove dust, fingerprints, and light stains.
Which Commercial Products have the Best Reviews for Kitchen Cabinet Cleaning?
The main products recommended for cleaning kitchen cabinets before repainting are:
- Krud Kutter Kitchen Degreaser: This powerful cleaner is specifically designed to tackle tough grease and grime found in kitchens.
- Simple Green All-Purpose Cleaner: A versatile and eco-friendly option, Simple Green effectively removes dirt and food residue without harsh chemicals.
- Mrs. Meyer’s Clean Day Multi-Surface Cleaner: Known for its pleasant scents and plant-derived ingredients, this cleaner is effective yet gentle on surfaces.
- Mean Green Super Strength Cleaner: This industrial-strength cleaner is excellent for heavy-duty cleaning, making it suitable for cabinets that have accumulated years of grease.
- Dawn Ultra Dish Soap: This common household dish soap is surprisingly effective for cleaning cabinets when diluted with water, providing a budget-friendly option.
Krud Kutter Kitchen Degreaser: This cleaner is formulated to break down tough grease and grime, making it ideal for kitchen cabinets that have been exposed to cooking residues. Its strong yet non-toxic formula allows for effective cleaning without damaging the cabinet surface, ensuring a clean slate for repainting.
Simple Green All-Purpose Cleaner: Simple Green is a biodegradable cleaner that excels at removing dirt and stains from a variety of surfaces, including kitchen cabinets. It is free from harsh chemicals, making it a safe choice for households with pets and children while still delivering powerful cleaning results.
Mrs. Meyer’s Clean Day Multi-Surface Cleaner: This product combines effective cleaning power with delightful scents derived from essential oils. It is formulated to clean surfaces without leaving harmful residues, making it safe for painted cabinet finishes while providing a refreshing aroma during cleaning.
Mean Green Super Strength Cleaner: With its industrial-strength formula, Mean Green is capable of tackling the most stubborn grease and grime, making it perfect for cabinets in heavily used kitchens. Its concentrated formula ensures that a little goes a long way, making it a cost-effective solution for deep cleaning before repainting.
Dawn Ultra Dish Soap: While primarily a dish soap, Dawn is effective for cleaning cabinets when mixed with warm water. Its grease-cutting properties make it suitable for removing food residues, and its affordability and accessibility make it a go-to option for many households looking to clean their cabinets thoroughly.
Are There Effective DIY Cleanser Recipes for Kitchen Cabinets?
There are several effective DIY cleanser recipes that can be used for cleaning kitchen cabinets before repainting.
- Baking Soda Paste: A mixture of baking soda and water creates a gentle abrasive paste that can effectively remove grease and grime from cabinets.
- Vinegar and Water Solution: Combining equal parts of vinegar and water provides a natural disinfectant that cuts through tough stains and odors.
- Dish Soap and Warm Water: A simple solution of dish soap mixed with warm water helps to dissolve grease and dirt, making it easier to wipe down surfaces.
- Lemon Juice and Olive Oil: This mixture not only cleans but also conditions wooden cabinets, leaving a fresh scent and a natural shine.
- Essential Oil Infused Cleaner: Adding a few drops of essential oils to a vinegar or soap solution can enhance cleaning power while providing a pleasant aroma.
Baking soda paste is effective due to its mild abrasive properties, which allow it to scrub away tough built-up residue without damaging the cabinet surface. Simply mix baking soda with water to form a paste, apply it to the affected areas, and scrub gently before wiping clean.
The vinegar and water solution is a classic DIY cleaner known for its ability to cut through grease and disinfect surfaces. Vinegar’s acidity helps dissolve tough stains, making it an excellent choice for preparing cabinets for repainting.
A dish soap and warm water solution is one of the simplest and most effective methods for regular cleaning. The soap works by breaking down grease, while warm water helps to lift dirt, making it easy to wipe away grime from cabinets.
Lemon juice and olive oil not only clean but also nourish wooden cabinets, preventing them from drying out. The acidity of lemon juice helps to remove stains, while the olive oil provides a protective layer, enhancing the wood’s natural beauty.
Infusing your cleaning solution with essential oils can not only improve the scent but also add antimicrobial properties, enhancing the cleaning efficacy. Choose oils like tea tree or lavender for their natural antiseptic qualities, and mix them into your vinegar or soap solution for an added boost.
How Should You Clean Kitchen Cabinets Before Repainting?
To effectively clean kitchen cabinets before repainting, consider the following best cleansers:
- Grease-cutting dish soap: A simple yet effective option for cleaning cabinets, this type of soap helps to emulsify and lift grease and grime. Mix a few drops with warm water, use a soft cloth or sponge, and wipe down all surfaces to prepare for painting.
- Vinegar and water solution: This natural cleaner is excellent for breaking down sticky residues and is safe for most cabinet finishes. Combine equal parts white vinegar and water in a spray bottle, apply it to the cabinets, and wipe clean with a microfiber cloth for a streak-free finish.
- Baking soda paste: Ideal for tough stains, a paste made from baking soda and water can gently scrub away stubborn spots without damaging the cabinet surface. Apply the paste to the stained area, let it sit for a few minutes, then scrub lightly with a soft cloth before rinsing with water.
- Commercial degreasers: For heavy-duty cleaning, a commercial degreaser specifically designed for kitchens can be highly effective. Follow the manufacturer’s instructions, applying it to the cabinets and letting it sit to penetrate grease before wiping it away, ensuring you wear gloves for protection.
- Mineral spirits: If the cabinets have been previously painted or have a strong buildup of varnish, mineral spirits can help remove these layers. Apply a small amount to a clean cloth and gently rub the surface, being careful to work in a well-ventilated area due to the strong fumes.
What Are the Essential Steps for Properly Cleaning Cabinets?
Cleaning kitchen cabinets before repainting involves several essential steps to ensure a smooth finish.
- Remove All Items: Begin by emptying your cabinets completely to access every surface that requires cleaning. This step not only allows you to clean thoroughly but also helps you assess any repairs needed inside the cabinets.
- Dust and Wipe Down: Use a dry cloth or a microfiber duster to remove loose dust and debris from the surfaces of the cabinets. This initial step is crucial as it prevents dirt from mixing with your cleaning solution, which can lead to streaks or an uneven finish.
- Choose the Right Cleanser: Select a cleanser specifically designed for kitchen surfaces, as it will effectively tackle grease and grime. Look for non-toxic options or those labeled safe for painted surfaces to avoid damaging the finish.
- Apply the Cleanser: Dampen a cloth with the chosen cleanser and wipe down the cabinets, focusing on areas with heavy grease buildup. Ensure that you follow the manufacturer’s instructions for the best results and avoid oversaturating the wood.
- Scrub Stubborn Spots: For tough stains or grease, use a soft-bristled brush or a non-abrasive scrub pad. This will help lift the grime without scratching the surface, preparing it for repainting.
- Rinse and Dry: After cleaning, use a damp cloth to wipe away any cleanser residue, then dry the cabinets thoroughly with a clean towel. This step is important to prevent moisture damage and ensure the paint adheres properly when you start the repainting process.
- Inspect for Damage: Once the cabinets are clean and dry, inspect them for any signs of damage, such as cracks or peeling paint. This allows you to make necessary repairs before applying new paint, ensuring a smooth and professional-looking finish.
Which Tools and Materials are Necessary for the Cleaning Process?
To effectively clean kitchen cabinets before repainting, several tools and materials are essential:
- Degreaser: A powerful cleaner specifically designed to cut through grease and grime.
- Sponge or Scrub Brush: Tools for applying the cleaner and scrubbing surfaces.
- Microfiber Cloths: Soft materials for wiping down surfaces without scratching.
- Bucket: A container for mixing cleaning solutions and rinsing tools.
- Protective Gloves: Essential for protecting your hands from harsh chemicals.
- Masking Tape: Useful for protecting areas that you do not want to paint.
- Water: Needed for rinsing and diluting cleaning solutions.
- Drop Cloths: To protect your flooring and surrounding areas from drips and spills.
A degreaser is crucial as it penetrates and removes built-up grease, ensuring a clean surface for better paint adhesion. Look for a product that is safe for the materials of your cabinets and effective on stubborn stains.
A sponge or scrub brush allows you to apply the degreaser and scrub away any residue. Choose a brush with soft bristles to avoid damaging the cabinet finish while still being effective at removing dirt.
Microfiber cloths are ideal for wiping down surfaces after cleaning, as they are non-abrasive and highly absorbent, ensuring that no streaks are left behind. These cloths are also reusable and can be washed for multiple uses.
A bucket is necessary for mixing your cleaning solution and rinsing off sponges or brushes, making the cleaning process more manageable. It’s important to keep your tools organized and your work area efficient.
Protective gloves are important to wear while using chemical cleaners to safeguard your skin from irritation. They provide a barrier against harsh substances that can be harmful with prolonged contact.
Masking tape protects areas that should not be painted, such as countertops or backsplash tiles. It helps create clean lines and prevents paint from bleeding onto surfaces where it is not wanted.
Water is a basic yet crucial component for rinsing off cleaning solutions and diluting products as needed. Always ensure that surfaces are thoroughly rinsed to remove any residue that might interfere with paint adhesion.
Drop cloths are essential for protecting your flooring and adjacent areas from paint splatters and cleaning solution drips. They help contain the mess, making clean-up easier and preserving the condition of your home.
What Common Mistakes Should You Avoid When Cleaning Cabinet Surfaces?
When cleaning cabinet surfaces before repainting, it’s essential to avoid specific common mistakes to ensure the best results.
- Using Harsh Chemicals: Many people mistakenly choose strong chemical cleaners that can damage the finish of the cabinets. These products may strip away protective coatings or lead to discoloration, making the surface unsuitable for repainting.
- Neglecting to Test Cleaners: Failing to test a new cleaner on a small, inconspicuous area can result in unexpected damage. A spot test ensures that the cleaner won’t adversely affect the cabinet’s surface or finish, allowing you to proceed with confidence.
- Skipping the Rinse Step: After cleaning, some might overlook rinsing the surfaces properly, leaving behind cleaning residue. This residue can interfere with paint adhesion, potentially leading to peeling or flaking after repainting.
- Not Preparing the Area: Many forget to remove items from the cabinets or cover surrounding areas before cleaning. A cluttered workspace can lead to spills or accidents that complicate the cleaning and repainting process.
- Using the Wrong Tools: Using abrasive sponges or rough cloths can scratch the cabinet surfaces. It’s crucial to use soft, non-abrasive materials to avoid damaging the finish while effectively cleaning the dirt and grease.
- Ignoring Manufacturer Recommendations: Some may disregard the care instructions provided by the cabinet manufacturer. Following these guidelines can help avoid using inappropriate cleaners that may void warranties or damage the cabinetry.
- Cleaning Too Quickly: Rushing through the cleaning process can lead to missed spots or inadequate cleaning. Taking the time to thoroughly clean surfaces ensures that all dirt and grease are removed, providing a better foundation for repainting.
How Can Choosing the Wrong Cleanser Damage Your Cabinets?
Choosing the wrong cleanser for kitchen cabinets can lead to various forms of damage, affecting both the appearance and longevity of the cabinets.
- Harsh Chemicals: Many aggressive cleaning agents contain strong solvents that can strip the finish off cabinets.
- Incompatibility with Cabinet Material: Certain cleansers may react negatively with specific materials, such as wood or laminate, causing discoloration or warping.
- Residue Build-Up: Some cleansers leave behind a sticky residue that attracts dirt and grime, making the cabinets look dirty sooner.
- Surface Damage: Abrasive cleaners can scratch or dull the surface finish of cabinets, leading to a worn-out appearance over time.
Harsh Chemicals: Many aggressive cleaning agents contain strong solvents that can strip the finish off cabinets, resulting in a dull and uneven surface. This can also expose the underlying material to moisture and other damaging elements, leading to further deterioration.
Incompatibility with Cabinet Material: Certain cleansers may react negatively with specific materials, such as wood or laminate, causing discoloration or warping. For example, using a sodium-based cleaner on varnished wood can break down the finish, while acidic cleaners might damage laminate surfaces.
Residue Build-Up: Some cleansers leave behind a sticky residue that attracts dirt and grime, making the cabinets look dirty sooner. This residue can create a cycle of constant cleaning, as it can be challenging to remove, leading to frequent scrubbing that further damages the surface.
Surface Damage: Abrasive cleaners can scratch or dull the surface finish of cabinets, leading to a worn-out appearance over time. Even minor scratches can become more pronounced as dirt accumulates in them, ultimately requiring refinishing or replacement of the cabinets.
What Cleaning Techniques Might Negatively Impact Cabinet Finishes?
Several cleaning techniques can adversely affect cabinet finishes, particularly when preparing for repainting.
- Abrasive Cleaners: These harsh substances can scratch and dull cabinet surfaces, compromising the finish and making it difficult for new paint to adhere properly.
- Excessive Water Use: Over-saturating cabinets with water can lead to warping and damage to the wood or laminate, which may ruin the existing finish and create an uneven surface for repainting.
- Acidic or Alkaline Cleaners: Cleaners with high acidity or alkalinity can strip the protective coatings on cabinets, leaving them vulnerable to moisture and staining, thus necessitating additional prep work before repainting.
- Strong Solvents: Solvents such as acetone or paint thinner can dissolve finishes and glues, potentially creating patches that are difficult to paint over, making it crucial to choose milder options.
- Scrubbing Pads or Steel Wool: Using these abrasive tools can cause irreversible damage to the cabinet surface, leading to scratches that will be visible after repainting.
What Are the Key Benefits of Cleaning Cabinets Before Repainting?
The key benefits of cleaning cabinets before repainting are numerous and can significantly enhance the final result of your painting project.
- Improved Adhesion: Cleaning cabinets removes grease, dirt, and residues that can prevent paint from adhering properly. A clean surface ensures that the new paint will bond effectively, reducing the risk of peeling or chipping over time.
- Better Finish Quality: A thorough cleaning helps to eliminate imperfections on the cabinet surface, leading to a smoother and more uniform finish. This is especially important for achieving a professional look, as any leftover debris can disrupt the application of paint.
- Time and Cost Efficiency: Taking the time to clean cabinets beforehand can save time and money in the long run. By preventing paint adhesion issues and reducing the likelihood of needing touch-ups or repainting, you can avoid additional labor and material costs.
- Enhanced Durability: Clean surfaces allow for better paint penetration, which can enhance the durability of the paint job. This means your cabinets will be more resistant to wear and tear, making them last longer and maintain their appearance.
- Health Safety: Cleaning cabinets before repainting can also improve indoor air quality by removing harmful substances such as mold, mildew, or old paint that may contain lead. This is particularly important in kitchens, where cleanliness is essential for a safe cooking environment.
How Does Cleaning Influence the Adhesion of New Paint?
Cleaning plays a crucial role in ensuring that new paint adheres properly to surfaces, particularly when repainting kitchen cabinets.
- Removal of Grease and Grime: Cleaning surfaces like kitchen cabinets helps eliminate any built-up grease, grime, or food residues that could prevent paint from adhering effectively. These contaminants create a barrier that can lead to peeling or flaking of paint if not addressed before application.
- Surface Preparation: A thorough cleaning process prepares the surface for painting by providing a smooth, even base for the new paint. This preparation is essential as it helps the paint bond more effectively with the cabinet material, ensuring a longer-lasting finish.
- Use of Appropriate Cleansers: Selecting the best cleanser for kitchen cabinets is vital; it should effectively cut through grease without damaging the wood or finish of the cabinets. Products specifically designed for kitchen surfaces often contain ingredients that not only clean but also enhance the adhesion properties of the paint.
- Removal of Old Paint or Finish: In some cases, cleaning may also involve stripping away old paint or finish. This process can significantly improve adhesion by exposing the raw material of the cabinets, allowing the new paint to bond directly to the substrate.
- Drying Time: After cleaning, it’s essential to allow the cabinets to dry completely before applying paint. Any residual moisture can hinder adhesion, leading to potential issues like bubbling or peeling down the line.
What Aesthetic Improvements Can You Expect from a Thorough Cleaning?
A thorough cleaning of kitchen cabinets before repainting can yield several aesthetic improvements.
- Enhanced Surface Preparation: Cleaning removes dirt, grease, and grime, creating a smooth surface that ensures paint adheres properly. This step is crucial as any leftover residue can lead to uneven finishes and peeling paint over time.
- Improved Color Clarity: A clean surface allows the true color of the paint to shine through without any obstructions. This results in a more vibrant and uniform appearance, enhancing the overall aesthetic of the cabinets.
- Increased Visual Appeal: A thorough cleaning can significantly brighten the cabinets, making them look refreshed and new. This not only boosts the look of the cabinets but also enhances the overall ambiance of the kitchen.
- Longer Lasting Finish: By ensuring the cabinets are free from contaminants, the longevity of the new paint job is increased. A clean surface minimizes the risk of future issues like chipping or fading, maintaining the aesthetic improvements for a longer period.
- Preparation for Detailing: Cleaning allows for a better assessment of the cabinets’ condition, revealing any imperfections that can be addressed before repainting. This proactive approach ensures that any necessary repairs or touch-ups are made, further enhancing the visual outcome.