The engineering behind the Cabinet Door Installation Jig, 2-in-1 Mounting Tool represents a genuine breakthrough because it combines versatility with precision. I’ve tested it through multiple cabinet projects, and its adjustable, clear measurement scales make aligning doors a breeze—even for tricky frameless or face-frame styles. The smooth adjustment mechanism ensures consistent, accurate hardware placement, saving me time and frustrating adjustments.
Compared to simpler guides like the Cabinet Hardware Jig & Drill Guide for Handles and Knobs, this jig’s comprehensive kit with three drill bits and two adapters offers more control for complex setups. Its durable aluminum construction makes it withstand thousands of uses, unlike some less sturdy options. If you want reliable, precise results in less time, this tool really shines for both DIYers and pros alike.
Top Recommendation: Cabinet Door Installation Jig, 2-in-1 Mounting Tool
Why We Recommend It: This jig’s combination of adjustable features, durable construction, and complete kit with specialized drill bits provides unmatched accuracy and ease of use. It’s more versatile and precise than the simpler hardware guides, making it ideal for a wide variety of cabinet styles and projects.
Best woodworker tools to make kitchen cabinet: Our Top 5 Picks
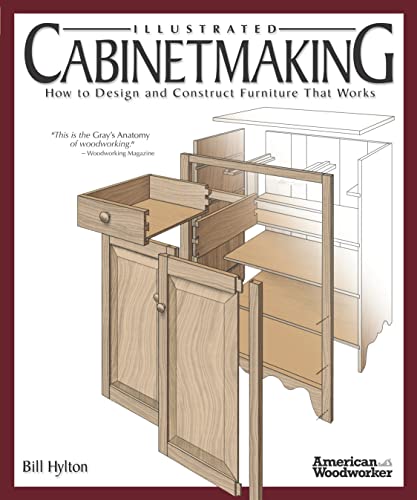
- Illustrated Cabinetmaking: How to Design and Construct – Best Value
- How to Make Kitchen Cabinets by Randy Johnson (2011) – Best Premium Option
- Cabinet Hardware Jig & Drill Guide for Handles and Knobs – Best for Installing Cabinet Hardware
- Cabinet Door Installation Jig, 2-in-1 Mounting Tool – Best for Beginners
- Metal Cabinet Hardware Drill Guide for Handles and Knobs – Best for Accurate Hardware Drilling
Illustrated Cabinetmaking: How to Design and Construct
- ✓ Clear, detailed illustrations
- ✓ Step-by-step instructions
- ✓ Versatile for all skill levels
- ✕ Limited advanced techniques
- ✕ Slightly basic for seasoned pros
| Book Title | Illustrated Cabinetmaking: How to Design and Construct |
| Author/Publisher | Fox Chapel Publishing |
| Price | USD 20.05 |
| Intended Use | Guide for designing and constructing kitchen cabinets |
| Content Focus | Woodworking techniques, cabinet design principles, construction methods |
| Format | Printed book with illustrations |
You’ve probably wrestled with confusing plans or vague instructions when trying to build kitchen cabinets. That frustration melts away the moment you flip through “Illustrated Cabinetmaking.” It’s like having a seasoned pro sitting right next to you, guiding each step with clear diagrams and practical tips.
The book’s illustrations are a game-changer. They break down complex joints and panel setups into simple visuals that stick.
I found myself referencing them often, especially when tackling tricky cuts or fitting pieces together.
What really stands out is the step-by-step approach. It’s not just theory—every stage of cabinet design and construction is detailed with easy-to-follow instructions.
The techniques are applicable whether you’re a beginner or looking to refine your skills.
The layout makes it easy to find what you need quickly. I appreciated the sections on different styles and customizations, which gave me ideas for my own project.
Plus, the compact size makes it easy to keep nearby in the workshop.
At just over $20, it feels like a small investment for a huge boost in confidence and craftsmanship. I’ve built a few cabinets now, and this book has become my go-to reference.
If you want to cut down on mistakes and make your projects look professional, this is a solid pick.
How to Make Kitchen Cabinets by Randy Johnson (2011)

- ✓ Clear, detailed instructions
- ✓ Helpful diagrams and photos
- ✓ Focus on practical techniques
- ✕ Slightly advanced for beginners
- ✕ Limited on decorative styles
| Author | Randy Johnson |
| Publication Year | 2011 |
| Publisher | Fox Chapel Publishing |
| Price | USD 72.15 |
| Product Category | Woodworking guide for kitchen cabinets |
| Content Focus | Techniques and methods for making kitchen cabinets |
Ever wrestled with confusing plans and vague instructions when trying to build your own kitchen cabinets? That frustration melts away the moment you open “How to Make Kitchen Cabinets” by Randy Johnson.
This book breaks down the process step-by-step, making even complex woodworking projects feel approachable.
From the start, I appreciated how clearly Johnson explains the fundamentals. The detailed diagrams and photos help you visualize each stage, so you’re not just guessing what’s next.
It’s like having a seasoned pro guiding you through every cut and assembly.
I especially liked the focus on real-world techniques—how to properly measure, cut, and assemble for a professional finish. The tips on choosing the right wood and hardware saved me from costly mistakes.
Plus, the project plans are flexible enough to adapt to different styles and sizes, which is great if you want to customize your cabinets.
The book isn’t just about the ‘how’; it also explains the ‘why’ behind each step. That deeper understanding boosts your confidence and helps you troubleshoot issues along the way.
I found myself referencing it repeatedly, especially when tackling tricky joints or finishes.
Overall, this guide turns a daunting task into a manageable project. It’s perfect for DIYers who want to learn woodworking skills while building something useful.
If you’re ready to craft beautiful, durable cabinets, this book will be your new best friend in the shop.
Cabinet Hardware Jig & Drill Guide for Handles and Knobs

- ✓ Quick setup and repeatable
- ✓ Heavy-duty, durable build
- ✓ Portable and compact design
- ✕ May be tricky for very small projects
- ✕ Slight learning curve for beginners
| Material | High-quality stainless steel, aluminum, and ABS plastic |
| Durability | Suitable for thousands of uses, even by contractors |
| Adjustability | Dividable into smaller sections for portability and storage |
| Application Compatibility | Fits most cabinet door stiles and rails, including handles and drawer fronts |
| Setup Time | Single setup required for multiple drilling operations |
| Precision | High accuracy with built-in scale for precise hole positioning |
Many folks assume that installing cabinet handles and knobs is just a matter of eyeballing and guessing the spacing. But after using this TBVHOMM jig, I can tell you that precision really makes a difference.
It’s surprisingly straightforward to set up, and once you do it once, you can repeat the process effortlessly.
The first thing I noticed is how solid the construction feels. Made of stainless steel, aluminum, and ABS plastic, it’s built to last, even with heavy use.
The scale markings are super precise, which means I could trust the measurements without second-guessing.
What really sold me is how portable it is. The jig can be broken into smaller sections, fitting easily into the included pouch.
It didn’t take up much space in my toolbox, and I appreciated how quick it was to carry around on different projects.
Using this guide, I was able to drill evenly spaced holes for multiple cabinet doors. It works great on various styles of stiles and rails, and I even used it for drawer fronts.
The setup time saved was noticeable, and I didn’t need to double-check my work afterward.
If you’re tired of uneven holes or wasting time measuring, this jig is a game-changer. It’s simple, accurate, and durable enough for daily use.
Plus, the price point makes it a no-brainer for both DIYers and professionals.
Cabinet Door Installation Jig, 2-in-1 Mounting Tool

- ✓ Precise adjustable positioning
- ✓ Durable aluminum construction
- ✓ Complete installation kit
- ✕ Slight learning curve
- ✕ May be overkill for small projects
| Material | Durable aluminum alloy |
| Measurement Scale Range | 0-30 units with dual scales |
| Board Thickness Compatibility | 10mm to 40mm (0.39″ to 1.57″) |
| Included Drill Bits | 3 with depth stops |
| Adjustment Mechanism | Smooth adjustment with quick-adjust knob and locking lever |
| Application Compatibility | Suitable for left- and right-hand doors, frameless or face-frame cabinets |
Ever wrestled with trying to line up cabinet doors perfectly, only to end up with crooked hardware and wasted time? That frustration ends the moment you clamp this 2-in-1 Mounting Tool onto your door.
Its adjustable design makes it easy to position, even if you’re working with different thicknesses from 10mm to 40mm. No more guessing or measuring by eye — everything lines up with the clear measurement scales.
The aluminum alloy construction feels sturdy without adding bulk. It glides smoothly as you turn the adjustment knob, locking firmly into place.
I found this especially helpful when marking for drilling, because the jig stayed exactly where I wanted it, reducing slip-ups. The included drill bits with depth stops and mounting adapters cover just about every need you’ll encounter during cabinet installation.
Using it was surprisingly quick. Whether you’re right- or left-handed, it adapts easily to both sides of the door.
Plus, it’s compatible with frameless and face-frame cabinets, which is a huge time saver. The tool’s versatility means you won’t need multiple jigs for different projects.
I appreciated how much it simplified the process — I could focus on the craft, not the setup.
If you’re installing multiple doors or just want a foolproof way to get perfect alignment, this jig is a game-changer. It’s well-made, easy to operate, and takes the guesswork out of cabinet hardware placement.
Honestly, it made my project smoother and more professional-looking than I expected.
Metal Cabinet Hardware Drill Guide for Handles and Knobs

- ✓ Precise and easy to set up
- ✓ Durable and high-quality build
- ✓ Portable and compact design
- ✕ Slightly pricey
- ✕ May be overkill for small projects
| Material | High-quality stainless steel, aluminum, and ABS plastic |
| Dimensions | Adjustable to fit various cabinet door styles and rails |
| Precision | High-accuracy scale for precise drilling |
| Durability | Capable of thousands of uses, suitable for professional and DIY use |
| Portability | Dividable into smaller sections with included storage pouch |
| Application Compatibility | Suitable for cabinet handles, knobs, door stiles, rails, and drawer fronts |
Imagine carefully drilling holes for cabinet handles, only to realize halfway that your measurements are slightly off. That was my moment of surprise when I used this Metal Cabinet Hardware Drill Guide—its precision and ease of setup really caught me off guard.
This guide is surprisingly sturdy, made from a mix of stainless steel, aluminum, and ABS plastic. It feels solid in your hand, not flimsy at all, which instantly boosts confidence when you’re working on detailed woodworking projects.
The scale markings are crisp and precise, making it easy to set up and repeat measurements without second-guessing.
What I really appreciated was how quick and straightforward the setup was. Once I adjusted it to my first handle, I could just flip it to do the rest, saving me a ton of time.
Plus, the guide disassembles into smaller sections, so storing or carrying it around isn’t a hassle at all—comes with a handy pouch too.
It’s compatible with nearly all cabinet styles, so whether you’re working on drawer fronts or door rails, this tool fits the bill. It’s built tough enough to handle multiple projects, and the high corrosion resistance means it’ll last through many jobs.
Honestly, it’s a game-changer for both DIYers and professionals aiming for perfect, consistent results every time.
What Are the Essential Tools You Need to Begin Making Kitchen Cabinets?
To begin making kitchen cabinets, several essential tools are required to ensure precision and quality in the construction process.
- Table Saw: A table saw is fundamental for making straight, accurate cuts in large sheets of plywood and lumber. It allows woodworkers to rip and crosscut materials with ease, ensuring that all pieces are uniform and fit together seamlessly.
- Miter Saw: A miter saw is ideal for cutting angles, which is crucial for corners and joints in cabinet construction. It provides quick, precise crosscuts and can be adjusted for different angles, making it versatile for various cabinet designs.
- Router: A router is used for adding decorative edges to cabinet doors and for hollowing out areas in wood. It allows for intricate designs and can create joints such as dadoes and rabbets, which are essential for strong cabinet assembly.
- Drill/Driver: A drill/driver is necessary for creating pilot holes and driving screws, ensuring that all joints are secure. This tool is versatile and can also be used for drilling holes for hardware installation, making it indispensable in the cabinet-making process.
- Clamps: Clamps are vital for holding pieces of wood together while glue dries or when fastening parts. They provide the necessary pressure to ensure a tight fit, which is essential for the overall stability and durability of the cabinets.
- Sander: A sander smooths the surfaces of the wood, preparing it for finishing. Whether using a handheld or a stationary sander, achieving a smooth surface is critical for a professional-looking final product.
- Square: A carpenter’s square is crucial for ensuring that all cuts are square and that the cabinet frame is built accurately. It helps in checking the right angles, ensuring that everything lines up properly for assembly.
- Measuring Tape: A measuring tape is essential for taking accurate measurements of the space and the materials. Precision in measurement is key to fitting cabinets into designated spaces and ensuring all pieces are cut correctly.
Which Cutting Tools Are Most Recommended for Kitchen Cabinets?
The best cutting tools for kitchen cabinets are essential for achieving clean, precise cuts and professional finishes.
- Table Saw: A table saw is a fundamental tool for cutting large sheets of plywood and hardwood accurately. Its adjustable blade height and angle allow for various cuts, including rip cuts and crosscuts, making it versatile for cabinet making.
- Router: A router is ideal for adding decorative edges and grooves to cabinet doors and panels. It can create intricate designs and profiles, and when used with jigs, it enhances precision for joinery tasks.
- Circular Saw: A circular saw is portable and effective for making straight cuts in large materials. It’s especially useful for on-site adjustments and can handle different thicknesses of wood with the right blade.
- Jigsaw: A jigsaw is perfect for making curved cuts and intricate designs that a table saw cannot achieve. Its versatility allows for cutting various materials and shapes, making it an excellent tool for custom cabinetry work.
- Chisels: Chisels are essential for fine detail work and cleaning up joints and corners. They come in various sizes, allowing woodworkers to remove material precisely and create smooth edges in cabinetry.
- Miter Saw: A miter saw excels at making angled cuts, which are crucial for creating frames and corners in cabinet construction. Its ability to make quick, accurate crosscuts makes it a favorite among woodworkers for trim work.
- Biscuit Joiner: A biscuit joiner is used for reinforcing joints between cabinet pieces, providing additional strength and alignment. It creates precise slots for biscuits, which help keep the joints flush and secure during assembly.
What Makes a Table Saw Indispensable for Cabinet Making?
The table saw is often deemed indispensable for cabinet making due to its precision, versatility, and efficiency in handling various tasks.
- Precision Cutting: A table saw allows woodworkers to make straight, accurate cuts consistently, which is essential for joints and fitting pieces together seamlessly. The ability to adjust the blade height and angle further enhances precision for bevel cuts and dados.
- Rip Capacity: Table saws offer a significant rip capacity, enabling them to cut wide boards that other saws may struggle with. This feature is vital for cabinet making, where large pieces of plywood or hardwood are commonly used.
- Versatile Joinery: With the right jigs and accessories, a table saw can be used to create various joinery techniques such as grooves, rabbets, and tenons. This versatility makes it an essential tool for assembling cabinet components effectively.
- Efficiency in Material Removal: The power and speed of a table saw allow for quick material removal, significantly reducing the time spent on cutting tasks. This efficiency is particularly beneficial when working on multiple cabinet pieces that require similar cuts.
- Safety Features: Modern table saws are equipped with safety features such as blade guards, riving knives, and push sticks, which help minimize the risk of accidents. Understanding and utilizing these features can enhance safety while working with this powerful tool.
How Can a Circular Saw Simplify Cabinet Construction?
A circular saw is an essential tool that can greatly simplify the process of cabinet construction.
- Precision Cutting: A circular saw provides straight and accurate cuts, which are crucial for cabinet components like shelves, doors, and frames. With the right blade and technique, woodworkers can achieve clean edges that minimize the need for additional sanding or finishing.
- Portability: Unlike stationary saws, a circular saw is lightweight and easy to transport, allowing woodworkers to make cuts on-site or in their workshop with ease. This portability is especially beneficial for working with large sheets of plywood or lumber, making it simpler to handle materials in various settings.
- Versatility: Circular saws can be used for a variety of materials beyond just wood, including plywood, MDF, and laminate, making them suitable for diverse cabinet styles and designs. This versatility allows woodworkers to adapt quickly to different projects without the need for multiple specialized tools.
- Speed of Operation: Circular saws can cut through materials quickly, significantly reducing the time spent on cabinet construction. This efficiency is especially important for larger projects where time management is crucial, enabling woodworkers to complete tasks faster while maintaining quality.
- Ease of Use: Modern circular saws often include features such as laser guides and depth adjustment settings, making them user-friendly for both beginners and experienced woodworkers. These features enhance cutting accuracy and allow for more straightforward adjustments, contributing to better results in cabinet construction.
What Joinery Tools Should You Use for Strong Cabinet Assembly?
The best woodworker tools for making kitchen cabinets include a variety of joinery tools that ensure strong and durable assembly.
- Pocket Hole Jig: This tool allows for creating angled holes on one piece of wood that can be joined to another, providing a strong and secure connection. It is particularly useful for assembling frames and cabinets, as it hides the screws within the joint, resulting in a clean finish.
- Doweling Jigs: Doweling jigs help in accurately aligning dowels for joint reinforcement. By drilling precise holes into both pieces of wood, dowels create a strong bond when glued, which is essential for cabinet stability.
- Biscuits and Biscuit Joiner: A biscuit joiner cuts a small slot into the wood to accommodate a biscuit, a thin, oval-shaped piece of wood. This method enhances alignment and provides additional surface area for glue, making it ideal for connecting panels or edges in cabinet construction.
- Mortise and Tenon Tools: This traditional joinery method involves creating a mortise (a hole) in one piece and a tenon (a protruding piece) on another to fit inside it. It offers exceptional strength, especially for frame-and-panel construction common in cabinet making.
- Router and Router Table: A router can create various profiles and joinery, including grooves and dados, which are essential for fitting shelves and other cabinet components. When used with a router table, it provides increased stability and precision for repetitive cuts.
- Clamps: While not a joinery tool per se, clamps are crucial for holding pieces together while glue dries. They ensure that joints remain tightly pressed, which is vital for achieving strong, long-lasting connections in cabinet assembly.
- Saw (Table Saw or Miter Saw): Accurate cuts are fundamental to joinery, and a table saw or miter saw allows for precise angles and lengths. These saws are essential for cutting panels and components to the appropriate dimensions for assembly.
- Chisels: Chisels are used for refining joints, especially when creating mortises and cleaning up edges. They allow for fine adjustments, ensuring a snug fit between pieces, which is critical for structural integrity in cabinets.
Why Are Doweling Jigs Important for Cabinet Joints?
The underlying mechanism involves the jig’s ability to guide drill bits to specific locations, thereby reducing the margin for error that can occur with freehand drilling. This precision is essential because even minor misalignments can lead to weak joints that may fail over time due to stress and movement. Additionally, doweling allows for a larger gluing surface, which further contributes to the strength of the bond. The combination of these factors makes doweling jigs a critical tool for woodworkers aiming to produce high-quality kitchen cabinets.
How Do Pocket Hole Jigs Improve the Cabinet-Making Process?
Pocket hole jigs are essential tools that enhance the cabinet-making process by creating strong, hidden joints.
- Improved Joint Strength: Pocket hole jigs create a strong mechanical joint between two pieces of wood by using screws driven at an angle. This method increases the surface area of the joint, making it more resistant to pulling apart compared to traditional butt joints.
- Ease of Use: These jigs are user-friendly and allow woodworkers to quickly create pocket holes without extensive knowledge of joinery techniques. With adjustable settings, they accommodate various wood thicknesses, making them versatile for different projects.
- Faster Assembly: Using pocket hole jigs streamlines the assembly process by reducing the need for clamps or elaborate setups. This allows woodworkers to assemble cabinets and other projects more efficiently, saving time and increasing productivity.
- Hidden Fasteners: The design of pocket hole joints means that screws are hidden from view, resulting in a cleaner and more aesthetically pleasing finish. This is particularly beneficial in cabinet-making where visual appeal is important.
- Versatility: Pocket hole jigs can be used for a variety of woodworking projects beyond just cabinets, including furniture and frames. This versatility makes them a valuable addition to any woodworker’s toolkit.
What Finishing Tools Will Give Your Cabinets a Professional Appearance?
The finishing tools that can help you achieve a professional appearance for your cabinets include:
- Orbital Sander: This tool is essential for smoothing surfaces before applying finishes. It reduces the risk of swirl marks and provides a consistent finish across large areas, making it ideal for cabinet doors and frames.
- Paint Sprayer: A paint sprayer provides an even coat of paint or stain that brushes may not achieve. It allows for a smooth, factory-like finish, especially important for achieving professional results on vertical surfaces like cabinet doors.
- Brushes and Rollers: High-quality brushes and rollers can also contribute to a professional finish. They are particularly useful for detail work and can help apply finishes in tight spots or areas that a sprayer might miss.
- Sandpaper and Abrasives: Using a variety of sandpaper grits ensures a smooth finish and prepares the wood for staining or sealing. Starting with a coarser grit and moving to a finer grit helps eliminate imperfections and allows the finish to adhere better.
- Finishing Pad: A finishing pad is great for applying oil-based finishes or sealers. It provides a consistent application and can help eliminate bubbles and streaks, ensuring a flawless look on cabinet surfaces.
- Finish Applicator: This tool is designed for applying finishes evenly across your cabinetry. It can be particularly effective for large flat surfaces, ensuring a uniform layer of stain or varnish without leaving brush marks.
- Cloth Rags: Soft, lint-free cloths are essential for wiping off excess stain and applying oil finishes. They help in achieving a controlled application and can be used for polishing once the finish has dried.
- Dust Collection System: Keeping your workspace clean is crucial for a professional finish. Using a dust collection system minimizes dust particles settling on wet finishes, which can ruin the appearance of your cabinets.
How Does a Sander Enhance the Finish on Kitchen Cabinets?
Specifically designed for final sanding tasks, the finishing sander helps achieve a fine finish on surfaces prior to applying paint or stain. It operates at higher speeds with finer grits, ensuring that the wood is prepped for the best possible adhesion of finishes, resulting in a more durable and visually appealing outcome.
Why Is a Paint Sprayer Effective for Kitchen Cabinet Painting?
A paint sprayer is effective for kitchen cabinet painting because it provides an even and smooth finish that is difficult to achieve with traditional brushes or rollers.
According to a study published by the Journal of Coatings Technology and Research, spray application can reduce the amount of paint needed by up to 50% compared to brushing, which minimizes waste and creates a more consistent coat (E. H. Van Hyning, 2020). This efficiency is particularly important for woodworkers who aim for a professional-looking finish in less time.
The underlying mechanism behind the effectiveness of paint sprayers lies in their ability to atomize paint into fine particles, allowing for better coverage and adhesion on surfaces. When paint is sprayed, it can reach into crevices and detailed areas of cabinet designs that are often missed by brushes. Additionally, the high speed and fine mist produced by sprayers help to create a smooth finish without brush strokes, which is crucial when working with visible surfaces like kitchen cabinets.
Moreover, paint sprayers can significantly reduce the labor and time involved in the painting process. Traditional methods often require multiple coats and extensive prep work to achieve a satisfactory outcome, but with a sprayer, the process can be streamlined. This allows woodworkers to increase productivity while maintaining high-quality results, making it an essential tool in their arsenal for kitchen cabinet projects.
What Tool Maintenance Practices Ensure Longevity and Performance?
Effective tool maintenance practices are essential for ensuring the longevity and performance of woodworking tools used for making kitchen cabinets.
- Regular Cleaning: Keeping tools clean from dust, wood shavings, and residues is crucial to maintain their performance.
- Proper Storage: Storing tools in a dry, organized space prevents rust and damage, extending their life.
- Sharpening Blades: Regularly sharpening blades and bits improves cutting efficiency and reduces wear on the tools.
- Lubrication: Applying appropriate lubricants to moving parts minimizes friction and prevents mechanical failures.
- Inspection for Damage: Regularly checking tools for signs of wear or damage allows for timely repairs, preventing further issues.
Regular Cleaning: Tools should be wiped down after each use to remove any buildup of sawdust and debris. This practice not only keeps the tools in good condition but also ensures they operate smoothly during the next use.
Proper Storage: Tools should be stored in a designated space, such as a toolbox or pegboard, to avoid damage from being knocked around. Keeping them away from moisture will also prevent rust and corrosion, which can seriously impair their function.
Sharpening Blades: A sharp blade cuts more efficiently and requires less force, making woodworking safer and more enjoyable. Regular sharpening can be done using specialized tools like sharpening stones or jigs, ensuring the edges remain effective for clean cuts.
Lubrication: Regularly applying lubricant to parts such as gears and bearings can prevent them from seizing up. This maintenance practice helps in maintaining the precision of the tools and reduces wear and tear over time.
Inspection for Damage: Routine inspections can catch small issues before they become major problems, such as cracks in handles or dull blades. By identifying and addressing these issues early, woodworkers can keep their tools in optimal working condition.
Related Post: