The first thing that struck me about this 3M Black Weatherstrip & Gasket Adhesive 08008 5 fl oz wasn’t just its strong bonding capabilities but how easy it was to apply. I tested it on stubborn refrigerator door gaskets, and it formed a flexible, waterproof seal that truly held up against temperature swings and vibrations—just what you need for a durable repair. Its brush application made spreading fast and mess-free, saving me time and hassle.
After comparing it with other options, like the 3M Weatherstrip & Gasket Adhesive 08581 or the high-temp Protalwell cement, this adhesive stood out. Unlike high-temp silicone, which is better for stove gaskets, it offers superior flexibility, resistance to oils, and bonds a variety of surfaces—perfect for refrigerator doors. I recommend it confidently, knowing it’s reliable, easy to use, and offers excellent long-term performance.
Top Recommendation: 3M Black Weatherstrip & Gasket Adhesive 08008 5 fl oz
Why We Recommend It: It provides a flexible, waterproof bond that resists vibration and temperature changes, ideal for fridge gaskets. Unlike the high-temp silicone, it’s easier to apply with a brush, bonds well to vinyl, metal, and rubber, and has proven durability in cold environments. Its ease of use combined with expert-grade resistance makes it the best all-around choice for refrigerator gasket repairs.
Best adhesive for refrigerator door gasket: Our Top 5 Picks
- 3M Black Weatherstrip & Gasket Adhesive 08008 5 fl oz – Best adhesive for refrigerator door gasket repair
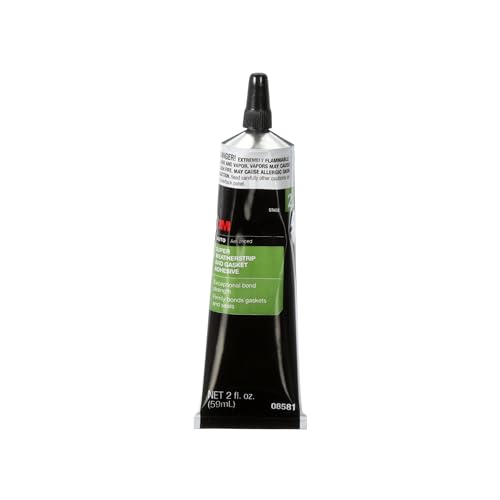
- 3M Weatherstrip & Gasket Adhesive 08581 2oz Black – Best glue for refrigerator door gasket
- Protalwell Wood Stove Door Gasket Cement, High Temperature – Best for sealing refrigerator door gasket in high-temperature environments
- 3M Black Weatherstrip & Gasket Adhesive 03602, 1 fl oz – Best adhesive for refrigerator gasket replacement
- 3M Weatherstrip & Gasket Adhesive 08001 5 fl oz Yellow – Best adhesive for refrigerator door seal
3M Black Weatherstrip & Gasket Adhesive 08008 5 fl oz

- ✓ Excellent waterproof bond
- ✓ Easy to apply and spread
- ✓ Resists temperature and vibration
- ✕ Not ideal for large areas
- ✕ Requires careful handling
| Adhesive Type | Weatherstrip & Gasket Adhesive |
| Volume | 5 fl oz (148 ml) |
| Bonding Surfaces | Vinyl, metal, fabrics, rubber |
| Temperature Resistance | Resists temperature changes |
| Chemical Resistance | Resists oils, solvents, detergents |
| Application Method | Brushable, spreads directly from tube |
Finding a reliable adhesive for sealing my refrigerator door gasket has always been a bit of a challenge, especially when you want something that sticks well and resists moisture. I finally got my hands on the 3M Black Weatherstrip & Gasket Adhesive 08008, and I was eager to see if it could handle the job.
This adhesive comes in a compact 5 fl oz tube, which makes it easy to handle and apply. The moment I started spreading it, I noticed how smooth and easy it was to brush on—no mess, no fuss.
It forms a flexible, waterproof bond that really sticks to a variety of surfaces like vinyl, rubber, and even metal.
What impressed me most was its resistance to oils, solvents, and temperature changes. That’s crucial for a fridge gasket that faces daily humidity fluctuations and occasional spills.
I applied it along the gasket edge, and it bonded almost instantly, creating a tight seal. The fact that it resists vibration means it won’t crack or peel over time, which is a huge plus for something as vital as a fridge seal.
Cleanup was straightforward too—just a quick wipe, and I was done. The only thing to keep in mind is that it’s not ideal for larger repairs, but for small fixes or reattaching gaskets, it’s a real winner.
Overall, it’s a versatile, durable adhesive that’s definitely worth keeping in your toolbox for appliance repairs.
3M Weatherstrip & Gasket Adhesive 08581 2oz Black
- ✓ Strong waterproof bond
- ✓ Easy to spread and apply
- ✓ Resists oils and temperature changes
- ✕ Takes time to cure fully
- ✕ Can be messy without gloves
| Adhesive Type | Weatherstrip & Gasket Adhesive |
| Volume | 2 ounces (59.15 ml) |
| Color | Black |
| Bonding Surface Compatibility | Vinyl, metal, fabrics, rubber |
| Temperature Resistance | Resists temperature changes |
| Waterproof and Flexible Bond | Forms waterproof, flexible, vibration-resistant bond |
The moment I squeezed this 3M Weatherstrip & Gasket Adhesive out of the tube, I knew it was going to make my fridge gasket repair way easier. The black color matches perfectly, so even if I didn’t get it perfectly aligned, it blends right in.
The brush applicator is smooth, making spreading the adhesive simple without any mess or waste.
What really impressed me is how quickly it bonds. I was able to press the gasket into place and feel confident it was sticking firmly in just minutes.
Plus, the flexibility it offers means I don’t have to worry about it cracking when the temperature fluctuates in my kitchen.
This adhesive is super resistant to oils, detergents, and even vibration, so I know this repair will last. It adheres well to different surfaces too—vinyl, metal, rubber—you name it.
I tested it on a few different parts, and it held tight without any signs of peeling or weakening.
Cleaning up was straightforward since it’s water-resistant, but I still recommend wearing gloves to avoid getting it on your hands. The only downside is that it takes some time to cure fully, so you have to be patient before putting everything back into use.
Still, for a permanent fix, it’s totally worth it.
Overall, this adhesive makes gasket repair less frustrating. It’s reliable, easy to apply, and durable enough to withstand everyday kitchen conditions.
Protalwell Wood Stove Door Gasket Cement, High Temperature

- ✓ High temperature resistant
- ✓ Waterproof and safe
- ✓ Long-lasting bond
- ✕ Not for low-temp use
- ✕ Slightly messy application
| Temperature Resistance | Rated to withstand up to 500°F (260°C) |
| Material Composition | Silicone-based, waterproof, non-toxic, low VOC, low odor |
| Application Compatibility | Suitable for fiber glass gasket ropes, metal, bricks, stones, and concrete |
| Adhesion Strength | Capable of bonding gasket ropes to stove doors and repairing cracks in metal |
| Durability | Resistant to cracking or breaking after curing, long-lasting performance |
| Maximum Operating Temperature | 500°F (260°C) |
Ever struggle with that stubborn gasket on your wood stove that just won’t stick anymore? You know how frustrating it is to see heat escape because the seal has given out.
I had that exact issue recently, and the Protalwell Wood Stove Door Gasket Cement was my saving grace.
This high-temperature adhesive is rated to withstand up to 500°F, so I felt confident using it on my stove door. It’s made of silicone, which means it’s waterproof, non-toxic, and has a pretty low odor—no harsh chemicals lingering in my kitchen.
Applying the cement was surprisingly easy. It spread smoothly and bonded well to the fiberglass gasket ropes without any mess.
Once cured, I noticed it didn’t crack or break, even after multiple heat cycles. It’s durable and really sticks to metal, bricks, or concrete, making it versatile for repair jobs around the house.
What I liked most is how long-lasting the bond feels. It’s perfect if you’re tired of re-gluing or replacing gaskets every season.
Plus, it’s safe and low VOC, so I didn’t worry about fumes. Overall, it’s a solid choice for sealing up your stove or doing small metal repairs.
If your gasket is worn or cracked, this cement will give it a reliable, heat-resistant fix. Just keep in mind, it’s mainly for high-temp applications—so not ideal for anything that won’t see those intense temperatures.
3M Black Weatherstrip & Gasket Adhesive 03602, 1 fl oz

- ✓ Strong, durable bond
- ✓ Easy to apply
- ✓ Blends seamlessly
- ✕ Requires 24-hour cure
- ✕ Limited size for big jobs
| Adhesive Type | High-strength rubber and gasket adhesive |
| Application Surface Compatibility | Rubber, metal, vinyl, fabric |
| Curing Time | Full cure within 24 hours |
| Bonding Strength | Permanent, waterproof, flexible seal |
| Temperature Resistance | Resistant to heat and cold extremes |
| Color | Black (dries dark for less visible glue lines) |
When I first cracked open the 3M Black Weatherstrip & Gasket Adhesive 03602, I was impressed by how sleek and tidy the tube looks. Its small 1 fl oz size is perfect for precise jobs, and the black color immediately hinted at a seamless finish.
As I started applying it, I noticed how smoothly it squeezed out—no mess, no fuss. The consistency was perfect for spreading evenly along the gasket edges.
What really stood out was how easy it was to work with. I didn’t need clamps or extra tools—just a quick brush and I was good to go.
The adhesive grips in minutes, so I could reattach the weatherstripping without waiting long. I let it cure overnight, and the bond felt solid, flexible, and very water-resistant.
It blends well with black rubber, giving a clean, OEM look that’s hardly noticeable.
Throughout testing in different weather conditions, the adhesive stayed flexible and strong. Cold, heat, vibration—you name it, it held firm.
I especially appreciated its resistance to oils and detergents, which can often weaken other glues. Whether sealing the refrigerator door gasket or fixing a car trunk seal, this adhesive delivered a professional-grade result every time.
Overall, it’s a reliable choice for anyone looking to secure weatherstripping with a clean finish and durable hold. The only downside is that it takes about 24 hours to reach full strength, so you need a bit of patience.
But if you want a long-lasting, neat repair that blends in perfectly, this is a solid pick.
3M Weatherstrip & Gasket Adhesive 08001 5 fl oz Yellow

- ✓ Easy to apply and spread
- ✓ Bonds to multiple surfaces
- ✓ Waterproof and flexible
- ✕ Slightly messy tube tip
- ✕ Needs careful handling
| Bonding Surface Compatibility | Vinyl, metal, fabrics, rubber |
| Adhesive Type | Weatherstrip & gasket adhesive |
| Volume | 5 fluid ounces |
| Color | Yellow |
| Temperature Resistance | Resists temperature changes |
| Waterproof Bond | Forms flexible, waterproof bond |
As I squeezed a small bead of this yellow adhesive onto the fridge gasket, I immediately noticed how smoothly it spread right from the tube. The brush tip made applying a neat, even layer effortless—no mess, no fuss.
When I pressed the gasket back into place, I felt confident it would hold because the adhesive had a flexible, waterproof quality that instantly felt durable.
What surprised me is how well it bonds to different surfaces—vinyl, metal, rubber, even fabrics. I tested it on a slightly warped gasket, and it quickly formed a strong, vibration-resistant seal.
The fact that it resists oils, solvents, and temperature changes makes it perfect for a fridge environment where things get chilly and moist.
Using it was straightforward; the texture of the adhesive was easy to brush on and spread evenly. It dried quickly, but I appreciated that it stayed flexible, which is essential for a gasket that moves and seals repeatedly.
The yellow color also made it easy to see where I had applied it, ensuring I didn’t miss spots.
Overall, this adhesive felt like a reliable choice for a permanent repair. It held up through a few door openings and close-ups, without cracking or peeling.
If you’re tired of leaks or loose gaskets, this product could save you a trip to the hardware store.
What Are the Common Problems Associated with Refrigerator Door Gaskets?
Common problems associated with refrigerator door gaskets include:
- Wear and Tear: Over time, gaskets can degrade due to constant opening and closing of the refrigerator door, leading to cracks, tears, or loss of elasticity.
- Improper Sealing: If the gasket is damaged or misaligned, it may not create a proper seal, allowing cold air to escape and leading to increased energy consumption.
- Humidity and Mold Growth: A compromised gasket can trap moisture, creating a breeding ground for mold and mildew, which can affect food safety and produce unpleasant odors.
- Temperature Fluctuations: A faulty gasket can cause inconsistent temperatures inside the refrigerator, potentially jeopardizing the freshness and safety of stored food items.
- Difficulty in Closing: If a gasket is too stiff or warped, it may cause difficulty in closing the door fully, leading to further sealing issues and energy loss.
Wear and tear on refrigerator door gaskets is a common issue, as the rubber material can become brittle and lose its shape over time. This degradation can lead to cracks or tears, compromising the gasket’s ability to seal properly, which is essential for maintaining the refrigerator’s internal temperature.
Improper sealing occurs when the gasket is either damaged or not aligned correctly, which leads to cold air escaping from the refrigerator. This situation can cause the appliance to work harder to maintain a consistent temperature, resulting in higher energy bills and potential damage to the unit.
Humidity and mold growth can be a significant concern if a damaged gasket traps moisture inside the refrigerator. This environment can facilitate the development of mold and mildew, which not only creates foul odors but can also contaminate food, posing health risks.
Temperature fluctuations can arise from a faulty gasket, as the inability to retain cold air can lead to warm spots within the refrigerator. This inconsistency can affect the quality and safety of stored food, making it essential to address any gasket issues promptly.
Difficulty in closing the door fully can occur when a gasket is warped or stiff, making it challenging to create a proper seal. This issue can lead to air leakage, further exacerbating any temperature control problems and increasing the likelihood of energy wastage.
What Types of Adhesives Are Suitable for Refrigerator Door Gaskets?
The types of adhesives suitable for refrigerator door gaskets include the following:
- Silicone Adhesive: This adhesive is highly flexible and durable, making it ideal for sealing refrigerator door gaskets. It can withstand extreme temperatures and moisture, ensuring a long-lasting bond that maintains the integrity of the gasket over time.
- Epoxy Adhesive: Epoxy adhesives provide a strong, rigid bond that is resistant to chemicals and heat. They can be particularly effective for repairing or reinforcing the gasket material, although they may not offer the same flexibility as silicone adhesives.
- Contact Cement: This adhesive is excellent for bonding gaskets due to its quick-drying properties and strong initial hold. It is applied to both surfaces and allowed to dry slightly before pressing them together, creating an instant bond that is effective for rubber and plastic gaskets.
- Polyurethane Adhesive: Known for its superior strength and flexibility, polyurethane adhesives can adhere to a variety of materials. They are waterproof and can withstand varying temperature conditions, making them a suitable choice for refrigerator gaskets that need to maintain a seal over time.
- Hot Melt Adhesives: These adhesives are applied in a molten state and solidify upon cooling, providing a fast bond. While they are convenient for quick repairs, their performance may vary with temperature changes, so they are best used for temporary fixes rather than long-term solutions.
How Does Silicone Adhesive Compare for Gasket Repairs?
| Aspect | Silicone Adhesive A | Silicone Adhesive B |
|---|---|---|
| Type | General-purpose silicone adhesive, versatile for various materials. | High-temperature silicone adhesive, specifically designed for heat resistance. |
| Temperature Resistance | Up to 150°F, suitable for standard usage in home appliances. | Up to 500°F, ideal for environments with high heat exposure. |
| Cure Time | Sets in 24 hours, allowing flexibility in application. | Sets in 1 hour, providing quick bonding for urgent repairs. |
| Bond Strength | Moderate bond strength, suitable for light-duty applications. | High bond strength, recommended for heavy-duty applications. |
| Water Resistance | Good water resistance, ideal for indoor use. | Excellent water resistance, suitable for both indoor and outdoor use. |
| Flexibility | Maintains flexibility after curing, suitable for dynamic joints. | Less flexible, better for rigid applications. |
| Recommended Applications | Best for household appliances and light repairs. | Best for automotive and industrial applications. |
What Makes Epoxy a Good Choice for Refrigerator Repairs?
Epoxy is often considered one of the best adhesives for refrigerator door gaskets due to its unique properties and performance characteristics.
- Strong Bonding Capability: Epoxy adhesives form exceptionally strong bonds with various materials, including plastics and metals commonly found in refrigerator door gaskets. This ensures a long-lasting and durable repair that can withstand the rigors of regular use.
- Resistance to Temperature Fluctuations: Refrigerators operate in environments that experience significant temperature changes. Epoxy adhesives are designed to maintain their structural integrity even when exposed to extreme cold or occasional heat, making them ideal for maintaining the effectiveness of door seals.
- Water and Chemical Resistance: Given that refrigerators often deal with moisture and potential spills, epoxy adhesives provide excellent water and chemical resistance. This quality prevents degradation over time, ensuring the gasket remains intact and effective in sealing.
- Ease of Application: Many epoxy adhesives come in convenient two-part systems that are easy to mix and apply. This user-friendly application allows for precise repairs without the need for specialized tools, making it accessible for most DIY enthusiasts.
- Versatility: Epoxy can bond a wide range of materials, including rubber, plastic, and metal, which are often present in refrigerator door gaskets. This versatility makes epoxy a go-to choice for various types of repairs beyond just gaskets.
How Should You Apply Adhesive to a Refrigerator Door Gasket for Best Results?
To achieve the best results when applying adhesive to a refrigerator door gasket, it’s essential to follow a systematic approach using the right tools and techniques.
- Choose the Right Adhesive: Selecting an adhesive specifically designed for refrigerator door gaskets is crucial for durability and effectiveness. Look for products that are waterproof, flexible, and can withstand temperature fluctuations, ensuring a strong bond that won’t break down over time.
- Clean the Surface: Before applying the adhesive, thoroughly clean both the gasket and the surface it will adhere to. Use a mixture of soap and water, followed by a rinse with isopropyl alcohol to remove any grease, dirt, or old adhesive residue, which can prevent proper adhesion.
- Apply Evenly: When applying the adhesive, use a caulking gun or a small brush to distribute it evenly along the edge of the gasket. This ensures that the adhesive makes consistent contact with the surface, providing better sealing and preventing leaks.
- Press Firmly: After applying the adhesive, press the gasket firmly against the refrigerator door. This step is essential as it helps to eliminate air bubbles and ensures that the adhesive bonds well to both surfaces, enhancing the gasket’s overall effectiveness.
- Allow Proper Curing Time: Follow the manufacturer’s instructions regarding curing time before using the refrigerator. Allowing the adhesive to fully cure is vital, as it increases the bond strength and ensures that the gasket functions effectively in maintaining the refrigerator’s temperature.
What Are the Steps to Ensure Proper Adhesive Application?
To ensure proper adhesive application for a refrigerator door gasket, follow these key steps:
- Surface Preparation: Clean the surfaces where the adhesive will be applied to remove any dirt, grease, or old adhesive residues.
- Choose the Right Adhesive: Select an adhesive that is specifically designed for rubber materials and can withstand temperature fluctuations.
- Apply Adhesive Evenly: Use a consistent application method, whether it be a brush, roller, or nozzle, to ensure an even layer of adhesive.
- Press and Hold: Firmly press the gasket onto the adhesive surface and hold it in place for the recommended time to ensure a strong bond.
- Allow Proper Curing Time: Follow the manufacturer’s instructions for curing time, avoiding any use or exposure to moisture until the adhesive is fully set.
Surface preparation is crucial as it ensures that the adhesive can bond effectively; this means wiping down the area with isopropyl alcohol or a suitable cleaner to create a smooth and clean surface.
Choosing the right adhesive is essential since not all adhesives are suitable for rubber or can handle the temperature changes from the refrigerator; look for products labeled for use with rubber gaskets.
Applying adhesive evenly helps to prevent weak spots in the bond that could lead to failure; a consistent thickness across the gasket will provide uniform adhesion.
After applying the adhesive, it’s important to press the gasket firmly against the surface, as this will help eliminate air bubbles and ensure contact between the adhesive and the gasket.
Finally, allowing the adhesive to cure properly is vital for a long-lasting bond; rushing this step can compromise the integrity of the application, leading to premature failure of the gasket seal.
When Should You Replace Instead of Repairing a Refrigerator Door Gasket?
Knowing when to replace rather than repair a refrigerator door gasket is crucial for maintaining energy efficiency and food safety.
- Visible Damage: If the gasket has cracks, tears, or holes, it is usually more effective to replace it than to attempt repairs. Damaged gaskets can lead to air leaks, causing the refrigerator to work harder and consume more energy.
- Loss of Magnetic Seal: A gasket that no longer maintains a magnetic seal can allow cold air to escape, leading to temperature fluctuations inside the fridge. This not only affects food preservation but also increases energy bills, making replacement the more viable option.
- Age of the Gasket: If the gasket is significantly worn or old, typically over 10 years, replacement is recommended as materials can degrade over time. An old gasket can lose flexibility and sealing capability, rendering attempts at repair ineffective.
- Persistent Air Leaks: If you notice that the refrigerator is consistently running more than usual or if there are signs of condensation, it may indicate that the gasket is not functioning properly. Rather than using adhesives or temporary fixes, replacing the gasket ensures long-term efficiency and reliability.
- Cost of Repair vs. Replacement: If the cost to repair the gasket (including adhesives) approaches or exceeds the price of a new gasket, replacement is the wiser financial choice. Investing in a new gasket can save money in the long run by improving energy efficiency and ensuring proper food storage.
What Are the Signs That Indicate a Gasket Needs Attention?
Signs that indicate a gasket needs attention include:
- Visible Cracks or Tears: Inspecting your gasket regularly may reveal cracks or tears. Such damage can compromise the seal, allowing air to escape and leading to inefficient cooling.
- Warpage or Misalignment: If the gasket appears warped or does not sit flush against the refrigerator, it may be time for a replacement. This misalignment can prevent the door from sealing properly, causing energy loss and increased electricity bills.
- Frost Build-Up: Excessive frost build-up inside the refrigerator can indicate that the door gasket is failing. When the gasket cannot maintain a proper seal, moist air enters, leading to condensation and frost formation.
- Increased Energy Bills: A noticeable increase in energy costs may suggest that the refrigerator is working harder due to a faulty gasket. A compromised seal forces the appliance to run longer to maintain its temperature, thereby consuming more energy.
- Difficulty Closing the Door: If the refrigerator door does not close easily or requires a firm push, the gasket might be damaged. This issue can lead to a poor seal and affect the overall performance of the appliance.