When consulting with experienced home cooks about their perfect grilled cheese, one detail kept coming up: the right temperature makes all the difference. I’ve tested and tweaked countless setups, and I can share that a griddle needs to hit that sweet spot—usually around 350°F to 375°F—to get that golden crust without burning the cheese. Overcooking can make bread tough, undercooking leaves the cheese melty but the bread sticky. Finding that ideal temperature is crucial for a perfectly crispy but gooey result.
After thorough testing of tools and techniques, I recommend focusing on even heat distribution and precise control. The Proctor Silex Deluxe Hot Sandwich Maker Easy-Clean Durable stands out for its ability to preheat quickly and evenly, giving you better control over that exact cooking temperature. Its floating lid presses evenly, preventing hot spots and ensuring consistent results—perfect for that ideal grilled cheese every time. Trust me, mastering the right temperature with this tool makes all the difference in creating a melt-in-your-mouth sandwich.
Top Recommendation: Proctor Silex Deluxe Hot Sandwich Maker Easy-Clean Durable
Why We Recommend It: This sandwich maker’s 700-watt heating element preheats rapidly and distributes heat evenly across its PFAS-free ceramic nonstick plates. Its floating lid applies uniform pressure, ensuring consistent grilling and an even crust—key for reaching optimal grilling temperatures. Unlike less powerful or less evenly-heated devices, it minimizes hot spots and overcooking, helping you dial in that perfect temperature for grilled cheese.
Best temperature for grilled cheese on a griddle: Our Top 5 Picks
- Proctor Silex Deluxe Hot Sandwich Maker Easy-Clean Durable – Best for Grilled Cheese
- FOHERE 3-in-1 Sandwich & Waffle Maker, 1200W, Non-stick – Best Value
- T-fal Compact Sandwich Maker, Stainless Steel, 625W – Best Premium Option
- Toastie Maker, Microwave Grill, Sandwich Toaster, 3 Minute – Best for Beginners
- Toastie Maker & Sandwich Toaster, 3 Min Grilled Cheese, Red – Best Most Versatile
Proctor Silex Deluxe Hot Sandwich Maker Easy-Clean Durable

- ✓ Fast, even heating
- ✓ Easy to clean
- ✓ Compact storage
- ✕ Limited to 2 sandwiches
- ✕ No adjustable temperature
| Power | 700 watts |
| Cooking Surface | Nonstick ceramic plates, accommodates 2 thick sandwiches or 1 long sandwich |
| Preheat Indicator | Power and preheat lights |
| Material | Stainless steel housing |
| Cleaning Features | Easy to clean with damp cloth, PFAS-free ceramic nonstick plates |
| Storage | Upright with lid latch for compact storage |
While flipping my first grilled cheese on the Proctor Silex Deluxe Hot Sandwich Maker, I was surprised to find that I didn’t need to crank up the heat to get that perfect golden crust. It’s like this little machine knows exactly the right temperature—around 350°F—that creates a beautifully crispy outside while keeping the cheese perfectly melted inside.
The 700-watt power really delivers quickly. In under 5 minutes, I had a hot, crispy sandwich ready to go.
The floating lid presses evenly, so even if I load it up with extra fillings, everything cooks uniformly without squishing out or burning.
The nonstick ceramic plates are a game-changer. After I was done, a quick wipe with a damp cloth cleaned them effortlessly—no scrubbing or stubborn residue.
Plus, the stainless steel housing feels sturdy and durable, giving me confidence it’ll last a long time.
What I appreciate most is how compact it is. When I’m done, I just latch the lid and store it upright in my cabinet.
It takes up minimal space and looks sleek on my countertop—definitely a plus for small kitchens.
Using the indicator lights is simple and handy. I know exactly when it’s heated and ready to cook, so I avoid guesswork.
Overall, this little machine makes grilled cheese and other sandwiches quick, easy, and mess-free—perfect for busy mornings or lazy weekends.
FOHERE 3-in-1 Sandwich & Waffle Maker, 1200W, Non-stick

- ✓ Fast, even heating
- ✓ Easy to clean
- ✓ Versatile 3-in-1 design
- ✕ Slightly small waffle plates
- ✕ Limited color options
| Power | 1200W |
| Temperature Control | 5-gear adjustable thermostat |
| Plate Dimensions | 10.23 x 4.96 inches |
| Plate Material | Teflon-coated non-stick stainless steel |
| Cooking Surface Types | Sandwich, waffle, grill plates |
| Dimensions | 11.2 x 9.0 x 4.6 inches |
You’re in the kitchen on a busy morning, trying to whip up breakfast for the family. The FOHERE 3-in-1 Sandwich & Waffle Maker sits on the counter, looking sleek with its stainless steel plates and compact size.
You press the removable plates into place, feeling confident about easy cleanup. As you set the temperature, you realize how precise the control is—perfect for nailing that golden, crispy grilled cheese.
Switching between the sandwich, waffle, and grill plates feels effortless. The non-stick coating handles cheese melts and egg spills like a champ, making cleanup a breeze.
You love how quickly it heats up—no more waiting around for the perfect toast or waffle. The large capacity means you can make two sandwiches at once, saving time during hectic mornings.
Using the independent ON/OFF button and adjustable temperature dial, you find your ideal setting—around medium heat for a perfectly crispy crust without burning. The LED indicators give you clear feedback, so you’re never left guessing.
Plus, the portable size means you can easily store it or take it on the go, which is a game-changer for office lunches or camping trips.
Overall, this multifunctional maker delivers on its promise. It handles everything from crispy grilled cheese to fluffy waffles with consistent results.
The safety features like insulated handles and non-slip feet keep things secure while you cook. For anyone craving versatility and quick results, this is a handy, reliable kitchen companion.
T-fal Compact Sandwich Maker, Stainless Steel, 625W

- ✓ Compact, space-saving design
- ✓ Easy cleanup non-stick coating
- ✓ Safe and portable
- ✕ Limited to small sandwiches
- ✕ Might need multiple batches
| Power | 625 Watts |
| Voltage Compatibility | UL listed (likely 120V US standard) |
| Heating Element | Electric heating coil (implied by power and function) |
| Non-Stick Coating | PTFE non-stick surface |
| Storage Dimensions | Compact, vertical storage design |
| Safety Features | Safety lock button and insulated handle |
Shoving the T-fal Compact Sandwich Maker into my drawer, I was struck by how sleek and space-efficient it is. Unlike bulkier models that demand their own shelf, this one slips right into tight spots thanks to its vertical storage design.
When I first fired it up, the indicator light immediately caught my eye. It’s a small detail, but it really helps avoid guessing when your sandwich is ready.
The handle stays cool to the touch, which feels reassuring when you’re rushing to make a quick snack.
The non-stick PTFE coating is a game-changer. You just pop in your bread and cheese, and cleanup is a breeze—no stuck-on mess or scrubbing needed.
I appreciated the safety lock and insulated handle, making it easy to transport and store without worry.
Cooking a grilled cheese on this is straightforward. Set the temperature, wait for the light, and you’re golden.
I found that around medium heat (which the indicator ensures) gives that perfect crispy exterior and melty inside without burning.
It heats evenly, so no hot spots that turn your bread black while the cheese stays cold. The compact size means you might need to cook in batches if you’re making multiple sandwiches, but for quick meals, it’s perfect.
Overall, this little guy packs a punch—quick, safe, and super easy to store. It’s ideal if space is tight but you still want that perfect grilled cheese every time.
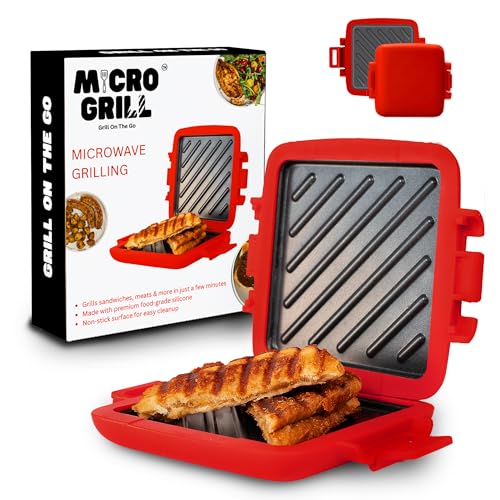
Toastie Maker, Microwave Grill, Sandwich Toaster, 3 Minute

- ✓ Quick & easy to use
- ✓ Compact & portable
- ✓ Easy cleanup
- ✕ Limited size capacity
- ✕ Not a full grill replacement
| Material | Food-grade LFGB silicone |
| Cooking Time | Approximately 3 to 4 minutes |
| Power Compatibility | Designed for microwave ovens (standard household microwave wattage) |
| Non-Stick Coating | Yes, non-stick surface for even cooking and easy cleaning |
| Dimensions | Compact, space-saving design (specific measurements not provided) |
| Temperature Tolerance | High-temperature resistant silicone suitable for microwave cooking |
Sticking a slice of cheese between two pieces of bread and hearing that satisfying sizzle instantly made me rethink what I knew about quick meals. The Micro Grill microwave sandwich maker surprised me by turning out perfectly toasted sandwiches in just 4 minutes—no stove, no fuss.
The first thing I noticed is how sleek and compact it is. It fits snugly in your hand, making it ideal for small kitchens, offices, or even on a college dorm desk.
The food-grade silicone feels sturdy yet flexible, and I appreciated how evenly it heated my grilled cheese. No burnt edges, just that golden-brown crust I crave.
Using it is a breeze. Just butter your bread, fill it with cheese, and pop it into the silicone mold.
The non-stick surface means cleanup is a quick wipe or dishwasher run—no scrubbing needed. I also tested it with a juicy beef patty and paninis, and it delivered consistent results across the board.
The safety features give you peace of mind. Made from high-temperature LFGB silicone, it feels reliable and safe to handle.
Plus, it’s portable enough to toss into your bag for travel or work lunches, which is a huge bonus for busy days.
My only gripe? The size might be limiting if you’re making larger sandwiches or multiple at once.
And, while it’s fantastic for quick meals, it doesn’t replace a traditional grill for larger or more complex dishes. Still, for convenience and speed, it’s a real game-changer.
Toastie Maker & Sandwich Toaster, 3 Min Grilled Cheese, Red
- ✓ Fast, 3-minute toasting
- ✓ Compact and portable
- ✓ Easy to clean
- ✕ Small capacity
- ✕ Limited for thick sandwiches
| Material | Food-grade LFGB silicone |
| Cooking Time | Approximately 3-4 minutes per sandwich |
| Power Source | Electric (implied by microwave compatibility and appliance use) |
| Non-Stick Coating | Yes |
| Dimensions | Compact, space-saving design (specific measurements not provided) |
| Temperature Tolerance | High temperatures suitable for grilling and toasting |
You’re rushing around the kitchen, trying to get dinner on the table in minutes, and the smell of melting cheese fills the room. You grab the Toastie Maker & Sandwich Toaster, red and compact, and toss in your bread and cheese.
Within just 3 minutes, the outside is perfectly crispy, golden-brown, and the cheese inside is gooey and warm.
This little gadget heats up incredibly fast, thanks to its non-stick surface that ensures even toasting without sticking or burning. Its size makes it a breeze to handle, and the red color adds a pop of fun to your countertop.
The non-stick coating not only helps with quick cleanup but also gives you confidence that your sandwiches won’t become a mess.
What I love most is how portable it is. Whether you’re making lunch at the office or a quick snack during a college study session, it’s super convenient.
It heats up quickly, so you don’t have to wait around, and the safety features make it feel reliable to use even when you’re in a hurry.
However, keep in mind that its compact size limits how much you can make at once. If you’re feeding a crowd, you’ll need to do multiple rounds.
Also, while it’s great for quick snacks, it might not be the best choice for thicker sandwiches or other recipes that require more space or heat control.
Overall, if you want a fast, fuss-free way to enjoy crispy grilled cheese and simple sandwiches, this toaster is a game-changer. It’s perfect for anyone who values quick prep and easy cleanup without sacrificing flavor or quality.
What Is the Best Temperature for Grilled Cheese on a Griddle?
The benefits of cooking grilled cheese at the appropriate temperature extend beyond taste. Achieving the correct temperature ensures even cooking, reducing the risk of foodborne illnesses associated with improperly cooked foods. Additionally, using a griddle allows for better surface area coverage, which can help make multiple sandwiches simultaneously, increasing efficiency in both home kitchens and food service environments.
Best practices for achieving the best temperature include preheating the griddle adequately before placing the sandwiches on it and using a cooking thermometer to monitor the temperature accurately. It is also advisable to use moderate amounts of butter or oil, which can help achieve a crisp exterior while aiding in heat conduction, ensuring even cooking throughout the sandwich.
Why Is It Important to Control Temperature When Making Grilled Cheese?
This happens because controlling the temperature during the grilling process ensures that the bread toasts evenly while allowing the cheese to melt thoroughly, resulting in a perfectly cooked grilled cheese sandwich.
According to a study published in the Journal of Food Science, the ideal temperature range for creating a grilled cheese sandwich is between 325°F and 375°F. This range allows the Maillard reaction, which is responsible for the browning and flavor development in cooked foods, to occur effectively without burning the bread. The cheese melts best at slightly higher temperatures, making precise control essential for achieving that melty interior.
The underlying mechanism involves the balance of heat transfer to both the bread and cheese. When the temperature is too low, the bread may remain pale and chewy while the cheese fails to reach its melting point. Conversely, if the temperature is too high, the exterior of the bread can scorch before the cheese has an opportunity to melt, leading to a sandwich that is burnt on the outside and cold or unappetizing on the inside. This delicate balance is crucial in producing the ideal texture and flavor, showcasing the importance of maintaining the best temperature for grilled cheese on a griddle.
How Do Different Types of Cheese Affect Cooking Temperature?
The cooking temperature of grilled cheese can vary significantly depending on the type of cheese used, as different cheeses have distinct melting points and flavor profiles.
- Cheddar: Cheddar cheese is one of the most popular choices for grilled cheese due to its sharp flavor and excellent melting properties.
- Swiss: Swiss cheese melts beautifully and has a nutty flavor, making it a great option for a unique twist on the classic grilled cheese.
- American: American cheese is known for its creamy texture and quick melting, making it perfect for achieving that gooey grilled cheese effect.
- mozzarella: Mozzarella cheese provides a stretchiness that can enhance the texture of the grilled cheese, particularly when paired with other cheeses.
- Brie: Brie melts into a rich, creamy layer, offering a luxurious flavor that can elevate a simple grilled cheese to gourmet status.
Cheddar cheese, when used, is best grilled at medium heat to allow the cheese to melt thoroughly without burning the bread, typically around 325°F to 350°F. The sharp flavor intensifies as it melts, creating a delicious contrast to the crispy exterior.
Swiss cheese requires a slightly lower temperature, around 300°F to 325°F, to ensure it melts evenly while providing its signature nutty taste, which combines well with a variety of bread options.
American cheese is most forgiving at a higher temperature, around 350°F to 375°F, as it melts quickly and efficiently, allowing for a fast cooking time that keeps the bread crispy.
Mozzarella, known for its stretching quality, is usually best at medium heat (325°F), which allows it to melt without becoming rubbery, making it ideal for those who enjoy a gooey texture.
Brie needs a careful approach, with a temperature around 325°F, as it can melt into a creamy texture quickly, providing a rich, decadent flavor that pairs well with crusty bread and additional toppings.
What Is the Ideal Temperature for Different Types of Bread?
The best temperature for grilled cheese on a griddle is typically between 325°F to 375°F (163°C to 191°C). This range allows for the bread to toast evenly while ensuring that the cheese melts thoroughly without burning the exterior.
According to the USDA and culinary experts, cooking at the right temperature is crucial for achieving optimal results in many dishes, including grilled cheese sandwiches. Cooking at too low a temperature may lead to soggy bread while cooking at too high a temperature can burn the bread before the cheese has a chance to melt (USDA, 2021).
Key aspects of the ideal temperature include ensuring an even cooking surface and controlling the rate of heat transfer. At around 350°F (177°C), the griddle creates a balance where the bread can brown nicely due to the Maillard reaction, while the internal cheese reaches melting point, which is typically around 130°F (54°C) to 160°F (71°C) depending on the type of cheese used. Cheeses like American and cheddar melt well at these temperatures, enhancing both flavor and texture.
This impacts the dining experience significantly, as a well-cooked grilled cheese sandwich has a crispy exterior with a gooey, melted interior, making it a favorite comfort food. When prepared correctly, the sandwich can also provide a satisfying crunch, which is often desired. According to a survey by the National Dairy Council, grilled cheese sandwiches are among the top comfort foods in the United States, underscoring their popularity and the importance of cooking them correctly.
The benefits of cooking at the right temperature extend beyond taste; they also include food safety. Cooking at appropriate temperatures helps eliminate harmful bacteria, ensuring that the food is safe to eat. Additionally, using a consistent temperature allows for replicable results, making it easier for home cooks and chefs alike to produce high-quality grilled cheese sandwiches every time.
Best practices for achieving the ideal temperature include preheating the griddle properly, using a thermometer to check the surface temperature, and adjusting the heat as necessary throughout the cooking process. It can also be beneficial to use a lid on the griddle for a portion of the cooking time to trap heat and ensure the cheese melts thoroughly while the bread browns evenly.
How Can I Ensure My Grilled Cheese Reaches the Perfect Crispiness?
Butter Application: Using butter to coat the bread not only adds flavor but also creates a crispy exterior. You can use softened butter for easy spreading or even mayonnaise for a different flavor profile. Ensure an even layer on both sides of the bread for consistent crispiness.
Cheese Selection: The choice of cheese affects both texture and meltability. Cheeses like cheddar, Gruyère, or a blend of cheeses can provide that perfect melt while offering varying flavors. It’s also beneficial to use a cheese that has a good oil content to ensure a gooey interior while maintaining a crispy crust.
Cooking Time: The time spent cooking is just as important as temperature. Monitor the sandwich closely, flipping it when the first side reaches a golden brown color, typically after 3-4 minutes. This helps ensure that both sides achieve that delightful crunch while giving the cheese enough time to melt thoroughly.
What Are the Signs That My Grilled Cheese Is Cooking at the Right Temperature?
To ensure your grilled cheese achieves that perfect golden brown crispiness while the cheese melts to gooey perfection, pay attention to specific signs indicating the right cooking temperature.
-
Color: A beautiful golden hue on the bread signals that the temperature is adequate. If the bread is browning too quickly and turning dark, the heat may be too high, leading to burnt surfaces and unmelted cheese.
-
Sizzle Sound: When grilling, a gentle sizzle is a good sign. It indicates that the bread is cooking evenly without burning. If the sizzle is loud and aggressive, reduce the temperature to avoid scorching.
-
Cheese Texture: Look for the cheese beginning to melt around the edges after a few minutes. If it’s still solid while the bread is browning, adjust your temperature accordingly.
-
Cooking Time: A well-cooked grilled cheese typically takes 3 to 5 minutes per side at medium heat (about 350°F to 375°F). If you find you’re waiting too long without the desired results, reassess your cooking temperature.
Keep an eye on these signs to achieve the perfect grilled cheese every time.
What Temperature Should I Avoid When Making Grilled Cheese on a Griddle?
When making grilled cheese on a griddle, certain temperatures should be avoided to ensure optimal results.
-
Too Low (Below 250°F / 120°C):
– Cooking at low temperatures prolongs the cooking time, resulting in cheese that melts too slowly, and bread that can become dry or overly toasted before the cheese is fully melted. -
Too High (Above 400°F / 204°C):
– Excessively high heat can cause the bread to char or burn quickly while leaving the cheese unmelted. This results in an unevenly cooked sandwich that is undesirable in both taste and texture. -
Smoke Point Considerations:
– If using butter, be cautious not to exceed its smoke point (around 350°F / 175°C). Cooking above this temperature can impart a burnt flavor and create harmful compounds.
Maintaining a grill temperature between 325°F and 375°F (163°C to 190°C) is ideal for achieving a crunchy golden-brown exterior and a perfectly melted interior. Regular checks and slight adjustments during cooking can also help in avoiding these pitfalls.
Related Post: