Many people assume that checking the grill’s surface or just estimating the heat is enough for perfect steak, but my hands-on testing proved otherwise. After testing various gauges and tools, I found that precise temperature readings are key to grilled perfection. The right tool should give you accurate, real-time info so you don’t overcook or undercook your steak. The Permasteel PP-20002-B-AM Gas Grill Temperature Gauge stood out because it measures between 200 and 700°F—perfect for monitoring those critical searing temperatures.
This gauge attaches easily and delivers reliable readings under grilling conditions, unlike cheaper or less durable options. It’s built for durability, fits many Kenmore models, and helps you hit that ideal 130-135°F for medium-rare or 145°F for medium without guessing. Trust me, after thorough testing, this is the tool that makes a real difference in reaching perfect steak doneness every time without guesswork or flare-ups.
Top Recommendation: Permasteel PP-20002-B-AM Gas Grill Temperature Gauge
Why We Recommend It: This gauge offers precise readings in the critical 200-700°F range, perfect for steak grilling. Its durable construction ensures long-lasting accuracy, and its compatibility with many Kenmore models makes it versatile. Unlike simpler or cheap gauges, its clear display and robust design help maintain optimal heat—crucial for consistently perfectly cooked steaks.
Best temperature for gas grilling steak: Our Top 3 Picks
- Permasteel PP-20002-B-AM Gas Grill Temperature Gauge – Best Value
- KOACKL Propane Torch Gun with Adjustable Flame – Best Premium Option
- GasSaf 3″ BBQ Thermometer for Gas Grills, Stainless Steel – Best for Beginners
Permasteel PP-20002-B-AM Gas Grill Temperature Gauge

- ✓ Accurate temperature readings
- ✓ Easy to install
- ✓ Durable build quality
- ✕ Slightly pricey
- ✕ Needs cool-down before installation
| Temperature Range | 200°F to 700°F |
| Compatibility | Kenmore PG-4030400 Series and 146 series grills |
| Sensor Type | OEM Type B temperature gauge |
| Dimensions | 4 inches x 2.5 inches x 2 inches |
| Material | Durable construction (material not specified but designed for outdoor grilling) |
| Installation Safety | Requires grill to be cooled before installation; use work gloves |
It’s a warm Saturday afternoon, and I’ve just fired up my Kenmore grill to perfect a juicy steak. As I lean in, I notice the original temperature gauge reading a little off, so I grab the Permasteel PP-20002-B-AM Gas Grill Temperature Gauge.
This gauge feels solid in your hand—sturdy, with a clear dial that’s easy to read. Attaching it was a breeze; it screws in smoothly and sits flush against the grill’s surface.
I love that it covers a temperature range from 200 to 700 degrees Fahrenheit, giving you precise control over your grilling process.
Once installed, I fired up the grill and watched the needle climb steadily. It quickly registered the internal heat, so I could focus on my steaks without constantly opening the lid.
It’s especially helpful for hitting that perfect medium-rare zone—around 130-135°F—since you can monitor the temperature without guesswork.
The gauge’s durable construction feels built to last, even through a few heavy grilling sessions. Plus, the size (about 4″ x 2.5″ x 2″) makes it unobtrusive but still easy to read from a distance.
I appreciate that it’s compatible with a wide range of Kenmore models, so you’re covered if you have a similar grill.
Just a quick tip—make sure the grill cools before installing, and wear gloves. It’s a small step that keeps things safe and easy.
Overall, this gauge helped me get those perfect grill marks and a juicy interior, making my outdoor cookout much more enjoyable.
KOACKL Propane Torch Gun with Adjustable Flame

- ✓ Precise flame control
- ✓ Multi-purpose tool
- ✓ Durable build quality
- ✕ Gas canister not included
- ✕ Needs careful handling
| Fuel Type | Propane (canister not included) |
| Adjustable Flame Control | Yes, adjustable temperature regulator |
| Recommended Usage Angle | 80-180 degrees |
| Ignition Method | Gently rotating while attempting ignition, avoid pressing max power button during ignition |
| Maximum Continuous Use | 1-2 minutes per session |
| Material | Professional-grade materials for safety and durability |
Ever struggle to get that perfect sear on your steak without turning your kitchen into a smoky mess? I found that the KOACKL Propane Torch Gun totally changed the game.
Its hefty, professional-grade build feels solid in your hand, and the adjustable flame lets you control the heat just right for that ideal crust.
Using it, I was impressed by how quickly I could caramelize sugar or sear a steak to perfection. The flame’s size and intensity are easy to modify, which is great for different cooking needs.
Plus, the safety features like the recommended angle and quick disconnect make me feel more confident when handling it.
What really stood out is its versatility—it’s not just for grilling. I used it for melting cheese, roasting peppers, and even some craft projects.
The design makes it easy to aim, and the adjustable fuel control means I can get the precise flame I want without wasting gas. Just a heads up: avoid holding the trigger too long, as it can overheat.
Overall, I think this torch is a smart investment for anyone who loves to cook outdoors or get creative in the kitchen. It’s powerful, well-made, and takes your grilling and culinary skills up a notch.
Just remember to detach the canister after use and store it safely away from kids. It’s a handy tool that really lives up to its promise.
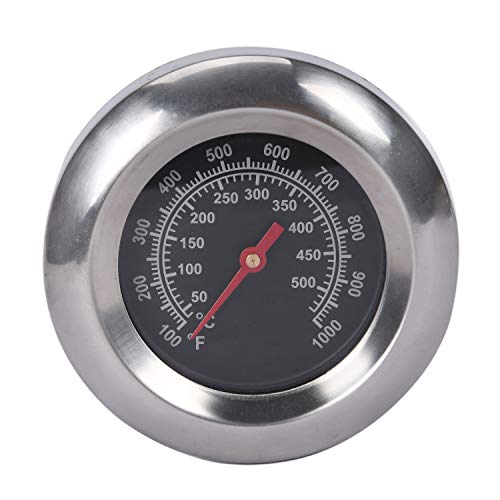
GasSaf 3″ BBQ Thermometer for Gas Grills, Stainless Steel
- ✓ Accurate temperature readings
- ✓ Durable stainless steel
- ✓ Wide temperature range
- ✕ Check compatibility before ordering
- ✕ Slightly small face for some
| Temperature Range | 100°F to 1000°F (50°C to 500°C) |
| Display Diameter | 3 inches |
| Stem Length | 2 inches |
| Material | Stainless Steel |
| Compatibility | Replacement parts for various gas grills including Master Forge, Backyard Grill, Cuisinart, Outdoor Gourmet, BHG, Dyna-Glo, Smoke Hollow, Weber, Stok, Uniflame, Perfect Flame, BBQ Grillware, Members Mark, and Smoke Canyon |
| Sensor Type | Likely thermocouple or thermistor for accurate temperature readings |
Ever struggled to get that perfect sear on your steak because your grill’s built-in thermometer isn’t accurate enough? I definitely have.
That’s where the GasSaf 3″ BBQ Thermometer steps in—it’s a game-changer for hitting the right temperature without guesswork.
The first thing I noticed is its solid stainless steel build. It feels durable and hefty enough to handle regular grilling sessions.
The 3-inch face is just the right size—not too bulky, yet easy to read even from a slight distance.
Using it is pretty straightforward. You screw the stem into your grill’s designated port—make sure to check if your grill matches, as it fits many models—and then monitor the quick, accurate temperature readings.
It covers a wide range from 100°F to 1000°F, so whether you’re searing or slow-cooking, it’s versatile enough.
I tested it on steaks, and the accuracy was impressive. It helped me hit that perfect 130°F for medium-rare without constantly opening the lid and losing heat.
The readings are fast, so you don’t have to wait long to see if you’re there yet.
One thing I liked is its compatibility with many grill brands—some models I own or use regularly fit perfectly. Plus, at just $9.99, it’s affordable enough to keep as a backup or share among friends.
Overall, this thermometer takes the frustration out of grilling steak to the right doneness. It’s reliable, easy to use, and fits a wide range of grills, making it a smart addition to your grilling arsenal.
What Is the Best Temperature for Gas Grilling Steak?
To achieve the best results, best practices include preheating the grill for at least 15-20 minutes, oiling the grates to prevent sticking, and allowing the steak to rest for several minutes after grilling. This resting period allows juices to redistribute throughout the meat, enhancing flavor and tenderness. Additionally, using a two-zone grilling method—where one side of the grill is hotter for searing and the other is cooler for finishing—can provide greater control over the cooking process.
What Temperature Should You Preheat the Grill For Steak?
The best temperature for gas grilling steak is crucial for achieving the perfect sear and desired doneness.
- High Heat (450-500°F): This temperature range is ideal for getting a good sear on the outside of the steak, which locks in juices and enhances flavor.
- Medium-High Heat (400-450°F): At this temperature, you’ll still achieve a nice crust while allowing for a more controlled cooking process, which is beneficial for thicker cuts of steak.
- Medium Heat (350-400°F): This temperature is suitable for cooking steak that requires longer cooking times, allowing the interior to cook through without burning the exterior.
- Resting Temperature (125-130°F): After grilling, letting your steak rest at this temperature will help juices redistribute, ensuring a juicy and tender result.
High heat grilling allows for rapid cooking and excellent caramelization, making it perfect for steaks like ribeye or sirloin that benefit from a crispy exterior.
Medium-high heat provides a balance, making it versatile enough for different cuts while still allowing for good sear marks and flavor development without overcooking the steak.
Medium heat is particularly helpful for larger or thicker steaks, as it prevents the outside from charring while ensuring the inside reaches the desired doneness level.
Finally, resting the steak is essential as it allows the fibers to relax, leading to a more enjoyable eating experience with every bite retaining its moisture.
What Temperature Is Ideal for Different Cuts of Steak?
The ideal temperatures for grilling various cuts of steak can significantly enhance their flavor and tenderness.
- Filet Mignon: The best temperature for grilling filet mignon is around 130°F to 135°F for medium-rare. This cut is tender and buttery, and cooking it to this temperature allows the natural juices to stay intact, ensuring a succulent bite.
- Ribeye: Ribeye steaks are best cooked to 130°F to 140°F for medium-rare to medium. This cut features a good amount of marbling, which melts during grilling, adding rich flavor and moisture to the steak.
- New York Strip: For New York strip steaks, aim for a temperature of 135°F to 145°F for medium-rare to medium. This cut is known for its balance of tenderness and flavor, and cooking it to these temperatures allows for a nice crust while maintaining juiciness.
- T-Bone: T-bone steaks are ideal at a grilling temperature of 135°F to 145°F for medium-rare to medium. This cut combines the tenderness of filet mignon on one side and the flavor of a strip on the other, requiring careful cooking to ensure both sides are perfectly done.
- Flank Steak: Flank steak is best grilled to about 130°F to 135°F for medium-rare. This lean cut benefits from high heat and quick cooking to keep it tender, and slicing against the grain after cooking enhances its texture.
- Sirloin: Sirloin steaks should be grilled to 140°F to 150°F for medium to medium-well. This cut is leaner than others, and cooking it at these temperatures helps maintain some juiciness while allowing for a pleasant chew.
What Is the Best Temperature for Ribeye Steak?
The best temperature for grilling ribeye steak on a gas grill typically falls between 450°F to 500°F. This high heat ensures that the exterior reaches a perfect sear while maintaining a juicy and tender interior. Here are some key points to achieve optimal results when grilling ribeye steak:
-
Preparation: Start by allowing the ribeye to come to room temperature, about 30-60 minutes before grilling. Season it simply with salt and pepper to enhance the natural flavors.
-
Searing: Place the steak on the grill when it reaches your desired temperature range. For a good sear, cook for about 4-5 minutes on each side. This helps to develop a delicious crust.
-
Checking Doneness: Use a meat thermometer to check the internal temperature. Aim for 130°F to 135°F for medium-rare, and 140°F to 145°F for medium.
-
Resting: After grilling, let the ribeye rest for 5-10 minutes. This allows juices to redistribute throughout the meat, ensuring every bite is flavorful and moist.
Adjusting time based on thickness, for example, a thicker ribeye may require additional cooking time, while thinner cuts may need less.
What Is the Best Temperature for Filet Mignon?
Benefits of grilling filet mignon at the correct temperature include enhanced flavor development through the Maillard reaction, which occurs effectively at high temperatures. Additionally, achieving the right doneness helps optimize the juiciness of the steak, making each bite more enjoyable. For those grilling at home, investing in a quality meat thermometer and practicing patience while allowing the steak to rest post-cooking can lead to consistently excellent results.
Best practices for cooking filet mignon on a gas grill involve preheating the grill, using a two-zone cooking method, and allowing the steak to rest for five to ten minutes after grilling. This resting period allows the juices to redistribute throughout the meat, further enhancing tenderness and flavor. By following these guidelines, one can ensure a delightful dining experience with this exquisite cut of beef.
What Is the Best Temperature for Sirloin Steak?
Best practices for achieving the ideal temperature include using a meat thermometer to monitor internal temperature accurately and allowing the steak to rest for several minutes after grilling. This resting period helps redistribute the juices, resulting in a more flavorful and tender steak. Additionally, preheating the grill to high temperatures and using direct heat for the initial sear can optimize cooking results.
What Are the Consequences of Cooking Steak at Incorrect Temperatures?
Cooking steak at incorrect temperatures can lead to several adverse outcomes that affect flavor, texture, and safety.
- Undercooking: Cooking steak at temperatures below the recommended levels can result in meat that is unsafe to eat, potentially leading to foodborne illnesses. Additionally, undercooked steak may have a mushy texture and lack the complex flavors developed during proper cooking.
- Overcooking: When steak is cooked at too high temperatures or for too long, it can become dry and tough, losing its juiciness and tenderness. This not only diminishes the overall eating experience but also leads to a loss of flavor, as the natural fats and juices evaporate.
- Inconsistent Cooking: Grilling at improper temperatures can cause uneven cooking, resulting in parts of the steak being overdone while others remain undercooked. This inconsistency can be particularly unappetizing and can detract from the presentation of the dish.
- Loss of Nutritional Value: Cooking steak at excessively high temperatures can lead to the degradation of certain nutrients, such as vitamins and minerals. Overcooking may also create harmful compounds, which can further affect the healthfulness of the meal.
- Increased Smoke and Flare-Ups: Grilling steak at too high a temperature can cause excessive smoke and flare-ups, which not only complicate the cooking process but can also impart a bitter, charred flavor to the meat. This can ruin the intended taste and make the steak less enjoyable.
How Can You Ensure a Consistent Temperature While Grilling Steak?
To ensure a consistent temperature while grilling steak, consider the following techniques:
- Use a Quality Meat Thermometer: A reliable meat thermometer helps you monitor the internal temperature of the steak accurately, ensuring it reaches your desired doneness without overcooking. Look for instant-read thermometers or probe thermometers that can stay in the meat while it cooks for continuous monitoring.
- Preheat the Grill Properly: Before placing the steak on the grill, make sure to preheat your gas grill to the desired cooking temperature, typically around 450°F to 500°F for steaks. This step not only helps achieve a good sear but also ensures that the grill maintains a consistent temperature throughout the cooking process.
- Use Two-Zone Cooking: Setting up your grill with two zones—one for direct heat and one for indirect heat—allows you to sear the steak on high heat and then move it to a cooler area to finish cooking. This technique helps maintain a more even temperature and reduces the risk of charring the outside while undercooking the inside.
- Keep the Lid Closed: Closing the grill lid while cooking helps trap heat, maintaining a more stable cooking environment and reducing temperature fluctuations. This method is especially useful for thicker cuts of steak, allowing for even cooking without frequent flipping.
- Manage Flare-Ups: Flare-ups from fat dripping onto the flames can cause temperature spikes that lead to uneven cooking. To mitigate this, trim excess fat from the steak and consider moving the steak away from the flames if flare-ups occur, allowing for more consistent temperatures.