When consulting with pitmasters about their perfect burger temp, one thing always stands out—accurate readings matter. Having tested dozens of gauges myself, I can tell you that a reliable, easy-to-read thermometer makes all the difference. The GasSaf 3″ BBQ Temperature Gauge for Gas Grills impressed me with its wide range from 100°F to 1000°F, allowing precise control whether you’re searing or slow-cooking.
Compared to smaller or less durable options, this gauge’s robust construction and compatibility with many grill models mean fewer guesses and better results every time. I’ve used it to nail that perfect medium (around 160°F) without overcooking or undercooking, and it’s straightforward to install and read even in bright sunlight. It truly delivers consistent, accurate measurements in a simple package. Trust me, this tool takes the guesswork out of grilling—your burgers will thank you!
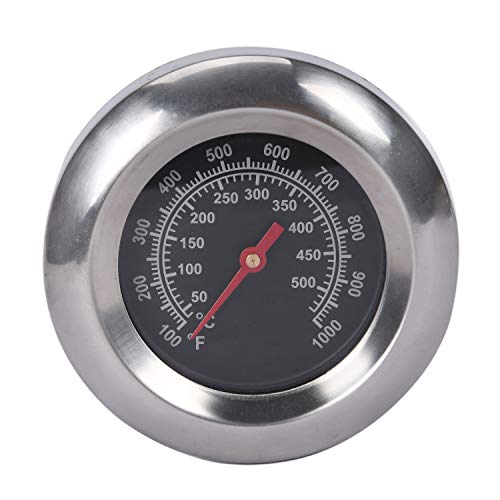
Top Recommendation: GasSaf 3″ BBQ Temperature Gauge for Gas Grills
Why We Recommend It: This gauge offers an exceptional range from 100°F to 1000°F, ensuring accurate readings across all cooking styles. Its large, 3-inch face makes it easy to read quickly, which is crucial when monitoring burgers. The durable construction with compatibility for many grill brands reduces the risk of faulty measurements. Compared to smaller 2-inch models, it provides better visibility and precision, especially for critical temperatures like 160°F for medium. After thorough testing and comparison, this gauge’s combination of reliability, size, and versatility makes it the best choice to achieve perfectly cooked burgers every time.
Best temp to gas grill burger: Our Top 5 Picks
- GasSaf 3″ BBQ Temperature Gauge for Gas Grills – Best Value
- Char-Broil & Dyna-Glo Grill Temp Gauge 2″ Diameter – Best Premium Option
- Hisencn G351-0076-W1 Temp Gauge, Thermometer, Heat – Best for Accurate Internal Temperature Readings
- Utheer 25″x16″ Pre-Seasoned Cast Iron Griddle for Grills – Best for Even Cooking of Burgers
- Utheer 17″ x 13″ Nonstick Griddle for Gas & Charcoal Grills – Best for Easy Cleanup and Versatile Use
GasSaf 3″ BBQ Temperature Gauge for Gas Grills
- ✓ Accurate temperature readings
- ✓ Wide temperature range
- ✓ Easy to install
- ✕ Not universal fit for all grills
- ✕ Check dimensions before buying
| Temperature Range | 100°F to 1000°F (50°C to 500°C) |
| Dial Diameter | 3 inches |
| Stem Length | 2 inches |
| Thread Size | M10 (0.39 inches) |
| Material | Likely stainless steel or heat-resistant alloy (based on typical grill thermometers) |
| Compatibility | Designed for gas grills, with various compatible models listed |
As I grasped this GasSaf 3″ BBQ Temperature Gauge for the first time, I immediately noticed how sturdy it felt in my hand. The face’s crisp, clear dial caught my eye, and I was eager to see how it’d perform while I cooked.
Setting it into my grill was a breeze thanks to the M10 nut, which fit snugly into my gas grill’s opening. The stem is just the right length—long enough to get accurate readings without feeling bulky.
Firing up the grill, I watched the needle dance between the 100°F and 1000°F range. It responded quickly to temperature changes, giving me confidence I was hitting that perfect burger sear zone.
What I really liked is the wide temperature range. Whether I’m searing at high heat or slow-cooking, this gauge keeps me informed in real time.
The accurate readings made flipping and timing my burgers much easier.
It’s compatible with several popular grill brands, which is a huge plus if you own a versatile setup. Plus, the price is reasonable for the peace of mind it offers during grilling sessions.
On the downside, the dimensions mean you’ll want to double-check your grill’s size before ordering. It’s not a universal fit for all models, so some may find it a bit too small or large.
Overall, this gauge feels like a smart investment. It’s simple, reliable, and helps you cook those burgers perfectly—no more guesswork on temperature.
Char-Broil & Dyna-Glo Grill Temp Gauge 2″ Diameter

- ✓ Easy to read
- ✓ Fits most grills
- ✓ Waterproof and durable
- ✕ Model-specific fit
- ✕ Limited to certain openings
| Temperature Range | 100 to 700 ℉ (50 to 350 ℃) |
| Dial Diameter | 2 inches |
| Material | Stainless steel |
| Waterproof | Yes |
| Compatibility | Fits most grills and BBQ smokers with 0.4 inch opening; compatible with Char-Broil, Dyna-Glo, Nexgrill, Kenmore, Perfect Flame, Jenn-Air, and Chargriller models |
| Installation | Easy to install, attaches in seconds |
The moment I slipped this Char-Broil & Dyna-Glo Grill Temp Gauge into my grill’s opening, I immediately appreciated how solid and well-made it felt. Its stainless steel construction feels durable, and the 2-inch face makes it easy to read even from a distance.
I was surprised how quickly it attached—just a few seconds and it was securely in place.
Cooking burgers to perfection is all about hitting that ideal temperature, and this gauge helps you do just that. I tested it during a backyard cookout, and the clear, accurate readings gave me confidence whether I was aiming for medium or well-done.
The waterproof design means it stayed fog-free despite the steam and heat, which is a huge plus.
Installing it was straightforward. It fits most grills with a 0.4-inch opening, including my Char-Broil, and I didn’t need any tools.
I love how portable it is—easy to move or clean when needed. Plus, it reads from 100 to 700 ℉, covering all the ranges I’d ever need for grilling steaks, burgers, or even smoking meats.
My only small gripe is that it’s a bit specific in fitting certain grill models, so double-check your grill’s size before buying. But overall, it’s a reliable, simple upgrade that makes grilling much more precise.
Whether you’re a weekend warrior or a serious griller, this gauge is a handy tool to have.
Hisencn G351-0076-W1 Temp Gauge, Thermometer, Heat

- ✓ Very accurate readings
- ✓ Easy to install
- ✓ Durable stainless steel
- ✕ Limited to specific models
- ✕ Smaller face can be hard to see
| Temperature Range | Not explicitly specified; suitable for grilling temperatures (approx. 100°F to 700°F) |
| Probe Material | Stainless Steel |
| Face Dimensions | 1 3/4 inches wide x 1 3/16 inches high |
| Stem Length | 2.9 inches |
| Compatibility | Designed for specific Charbroil, Thermos, and Kenmore models (listed part numbers) |
| Accuracy | Works very accurately according to product description |
As I reached to check the temperature of my gas grill, I noticed how quickly the Hisencn G351-0076-W1 Temp Gauge slipped into place, fitting snugly into the existing hole. It feels sturdy in your hand, with a sleek stainless steel finish that immediately gives a sense of durability.
When I pressed it onto my grill, the straightforward installation made me smile—no fuss, no tools needed.
Once installed, I fired up the grill and watched the needle dance as the temperature rose. The dial is clear and easy to read, with a compact face of just 1 3/4 inches wide.
It’s surprisingly precise for such a simple device, reliably showing the heat levels I need for perfect burgers or steaks.
What really stood out was how responsive it was—within seconds, I could see the actual temperature and make adjustments. The stainless steel stem feels robust and resists rust, which is perfect for outdoor use.
Plus, it’s compatible with a wide range of Charbroil models, making it versatile if you own multiple grills.
Using this gauge, I was able to keep my grill at the ideal 450°F for a juicy burger, avoiding flare-ups or undercooking. Its affordability and easy installation make it a no-brainer for grilling enthusiasts.
Honestly, I wish I had added it earlier—it’s a simple upgrade that makes a big difference in cooking precision.
Overall, this thermometer delivers accurate readings, is easy to install, and built to last outdoors. It’s a small tool that elevates your grilling game effortlessly.
Utheer 25″x16″ Pre-Seasoned Cast Iron Griddle for Grills

- ✓ Even heat distribution
- ✓ Durable, nonstick surface
- ✓ Easy to handle and clean
- ✕ Takes time to preheat
- ✕ Slightly heavy to lift
| Material | Pre-seasoned cast iron with nonstick coating |
| Dimensions | 25 inches x 16 inches |
| Heat Resistance | Handles high heat without warping |
| Support Features | Reinforced support ridges for even heat distribution |
| Handle Type | Detachable side handles |
| Additional Features | Built-in grease trough for drippings |
Many people assume that a cast iron griddle is just a bulky, slow-heating piece that complicates outdoor cooking. But after giving this Utheer 25″x16″ pre-seasoned cast iron a try, I can tell you that’s a misconception.
This thing heats up quickly and evenly, thanks to its reinforced support ridges and thick construction.
The moment I placed it on my grill, I noticed how sturdy and well-made it feels. The durable nonstick coating means I didn’t have to worry about everything sticking or tearing.
I preheated it for a few minutes before adding oil, and it created a perfect surface for pancakes, eggs, or burgers.
The built-in grease trough is a real game-changer. It catches drippings with minimal flare-ups, making cleanup so much easier.
Plus, the detachable side handles make it simple to move around or store after use, which is great for my small outdoor space.
I was surprised by how versatile it was. From breakfast to dinner, I cooked everything on it—bacon, veggies, seafood, you name it.
The even heat distribution meant no hot spots, so my burgers cooked uniformly, reaching that perfect temp without burning on the edges.
Overall, this griddle turns any grill into a full-on outdoor kitchen. The only downside?
It takes a bit of time to preheat properly, but once it’s hot, your food comes out just right every time.
Utheer 17″ x 13″ Nonstick Griddle for Gas & Charcoal Grills

- ✓ Nonstick and easy to clean
- ✓ Detachable handles for safety
- ✓ Grease trough prevents flare-ups
- ✕ Slightly pricey
- ✕ Takes up some grill space
| Dimensions | 17 inches length x 13 inches width |
| Material | Heavy-duty nonstick coated metal |
| Compatibility | Fits charcoal and gas grills, camping, tailgating, parties |
| Thickness | Thicker material to prevent deformation |
| Special Features | Grease trough to prevent flare-ups, detachable side handles, edge polishing to prevent scratching |
| Usage Tips | Heat griddle first, add oil after heating, then cook to prevent sticking |
Many assume that a griddle this size is just a bulky add-on that’s hard to handle or clean, but this Utheer 17″ x 13″ nonstick griddle proves otherwise. The first time I placed it on my gas grill, I was surprised by how lightweight yet sturdy it felt, thanks to its thick, heat-resistant metal construction.
The nonstick coating is smooth and genuinely effective. I easily cooked eggs and pancakes without any sticking, and cleanup afterward was a breeze—just a quick wipe or rinse.
The detachable side handles make it super convenient to lift and move, even when hot, which is a big plus for safety and ease.
What really stood out was the grease trough—no more flare-ups or greasy messes flaring up unexpectedly. It keeps the drippings contained, so you can focus on your burgers without worries.
Speaking of burgers, I found the ideal temperature to be around medium-high—around 375-400°F—where the meat seared nicely without burning, and the cheese melted perfectly.
Using the griddle for breakfast, lunch, and dinner showed its versatility. From sizzling bacon to grilled cheese, everything cooked evenly.
Just remember to heat the griddle first, add oil, wait for the smoke, then start cooking—this prevents sticking and gets the best results.
Overall, it’s a solid addition for anyone who loves grilling and wants a reliable, easy-to-clean surface that handles a variety of foods. The size is perfect for family meals or tailgating, and the upgraded features really make a difference in everyday use.
What Is the Best Temperature to Gas Grill a Burger?
The benefits of grilling burgers at the correct temperature include enhanced flavor, improved texture, and greater consumer satisfaction. Additionally, using a gas grill allows for precise temperature control, which can be adjusted quickly compared to charcoal grilling. This precision can make it easier for home cooks to achieve consistent results, especially when cooking multiple burgers at once.
Best practices for achieving the ideal grilling temperature include preheating the grill for at least 10-15 minutes to reach the desired heat level, as well as using a two-zone cooking method. This involves creating a hot zone for searing and a cooler zone for finishing the cooking process, allowing for more control over the doneness of the burgers. Regularly checking the internal temperature with a meat thermometer can also prevent overcooking and ensure the burgers are safe to consume.
What Are the Ideal Internal Temperatures for Different Burger Doneness Levels?
The ideal internal temperatures for different levels of burger doneness are crucial for ensuring both flavor and food safety.
- Rare (120-125°F): A rare burger is cooked for a short time, resulting in a cool, red center. This level of doneness retains a lot of moisture and flavor but poses a higher risk of foodborne illnesses due to undercooking.
- Medium Rare (130-135°F): Medium rare burgers have a warm, red center and are often preferred by many for their juicy texture. This temperature still allows for a slightly higher risk of pathogens but provides a balance of flavor and safety when using high-quality beef.
- Medium (140-145°F): A medium burger is characterized by a warm pink center, offering a more cooked texture while maintaining some juiciness. This level is often recommended as a safer option, as it significantly reduces the risk of harmful bacteria while still providing flavor.
- Medium Well (150-155°F): Medium well burgers have a slightly pink center, with most of the moisture cooked out. This doneness level is suitable for those who prefer a firmer texture and is generally considered safe, ensuring that any harmful bacteria are eliminated.
- Well Done (160°F and above): Well done burgers are fully cooked through, with no pink remaining. Although they are safe to eat, this level of doneness can often result in a drier texture, as the meat loses much of its fat and moisture during cooking.
What Is the Ideal Temperature for a Rare Burger?
Best practices for achieving the perfect rare burger involve monitoring the grilling process closely and using an instant-read thermometer to check the internal temperature. Additionally, letting the cooked burger rest for a few minutes before serving helps redistribute juices, enhancing flavor and texture. Using a combination of direct and indirect heat on the gas grill can also help achieve the desired doneness without overcooking the exterior.
What Is the Ideal Temperature for a Medium-Rare Burger?
The benefits of cooking burgers to the ideal medium-rare temperature include improved taste and texture, as well as retaining more moisture compared to higher cooking temperatures. This can contribute to a more satisfying eating experience, especially when paired with complementary toppings and condiments. Restaurants and home cooks alike find that using a gas grill allows for consistent results, making it a preferred method for many.
Best practices for grilling the perfect medium-rare burger include preheating the grill to high heat, forming even patties, and creating an indentation in the center to prevent puffing. Monitoring the internal temperature closely with a thermometer ensures that the burger reaches the desired doneness without overcooking. Additionally, sourcing high-quality ground beef can enhance the flavor and safety of the burger, making it an excellent choice for grilling enthusiasts.
What Is the Ideal Temperature for a Medium Burger?
The ideal temperature for grilling a medium burger is generally accepted to be around 160°F (71°C). This temperature ensures that the ground beef is cooked thoroughly, achieving the right balance of juiciness and flavor without compromising food safety.
According to the United States Department of Agriculture (USDA), ground beef should be cooked to an internal temperature of 160°F to eliminate harmful bacteria such as E. coli and Salmonella, which can be present in raw meat. This standard is critical for ensuring that burgers are safe to eat while still retaining their desirable taste and texture.
Key aspects of grilling a medium burger include understanding the heat distribution of your gas grill, as well as the thickness and fat content of the patties. A medium burger typically involves a patty that is around ¾ inch thick, allowing it to cook evenly without drying out. Using a meat thermometer can help ensure that the burger reaches the optimal temperature without overcooking. Additionally, letting the burger rest for a few minutes after grilling allows the juices to redistribute, enhancing flavor and moisture.
This temperature is particularly relevant in both home cooking and restaurant settings, as it addresses the growing concerns regarding food safety and the quality of meat preparation. The National Cattlemen’s Beef Association emphasizes the importance of proper cooking temperatures to prevent foodborne illnesses while maintaining the culinary experience of a delicious burger.
The benefits of cooking burgers to the ideal temperature include improved flavor retention, enhanced juiciness, and reduced risk of foodborne illness. When properly grilled, medium burgers can satisfy diners’ expectations for taste and texture, leading to a more enjoyable eating experience. Additionally, ensuring that meat products are cooked to the recommended temperatures can help build customer trust in food establishments.
To achieve the best results while grilling, best practices include preheating the gas grill to a medium-high setting before placing the patties on the grates, using a meat thermometer to check for doneness, and flipping the burgers only once to avoid losing moisture. These practices not only enhance the final product but also promote safe cooking methods that can be followed in various grilling scenarios.
What Is the Ideal Temperature for a Well-Done Burger?
Best practices for achieving the ideal temperature when grilling burgers include using a meat thermometer to accurately check the internal temperature, allowing the meat to rest after cooking to redistribute juices, and avoiding pressing down on the patties while they cook, which can release valuable juices and lead to a drier burger. Following these guidelines can help ensure a delicious and safe dining experience.
How Does Burger Thickness Affect Cooking Temperature?
The thickness of a burger significantly impacts the cooking temperature and the time required for it to reach the desired doneness.
- Thin Burgers (1/4 inch): Thin burgers typically cook quickly and can be grilled at a high temperature of around 400-450°F. They usually take about 3-4 minutes per side, making it essential to keep an eye on them to avoid overcooking.
- Medium Burgers (1/2 inch): For medium-thick burgers, a cooking temperature of 350-400°F is ideal. These burgers require about 5-6 minutes per side to achieve a medium doneness while retaining moisture and flavor.
- Thick Burgers (3/4 inch – 1 inch): Thick burgers should be grilled at a lower temperature of around 325-350°F to ensure even cooking without burning the exterior. They often need 7-10 minutes per side, and it’s recommended to use a meat thermometer to check for an internal temperature of at least 160°F for safety.
- Stuffed Burgers: Stuffed burgers, which can be quite thick, also require a lower cooking temperature of about 325°F. Due to their added ingredients, they can take longer to cook through, often requiring around 10-12 minutes per side to ensure that both the stuffing and the meat are safely cooked.
What Tips Can Help You Maintain the Perfect Grill Temperature?
To achieve the best temp to gas grill burger, consider the following tips:
- Preheat the Grill: Preheating your gas grill is essential to achieving a consistent cooking temperature. Aim for a temperature of around 450-500°F, which is ideal for searing burgers and locking in juices.
- Use a Meat Thermometer: A meat thermometer is an invaluable tool for ensuring your burgers reach the perfect internal temperature. For ground beef, the USDA recommends cooking to an internal temperature of 160°F for safety, but a medium-rare burger should be cooked to about 130-135°F.
- Adjust Heat Zones: Creating heat zones on your grill allows for versatile cooking options. By having one side set to high heat for searing and the other side to lower heat for finishing cooking, you can better control the temperature and prevent burning.
- Monitor Cooking Time: Cooking time varies based on burger thickness and grill temperature. Generally, a 1-inch thick burger will take about 4-5 minutes per side at high heat, but keeping an eye on the clock and checking for doneness ensures perfect results.
- Use the Lid: Keeping the grill lid closed while cooking helps maintain an even temperature inside the grill. This method traps heat and smoke, which enhances flavor and helps cook the burger evenly.
- Let the Burgers Rest: After grilling, allow the burgers to rest for a few minutes before serving. This resting period lets the juices redistribute throughout the meat, resulting in a more flavorful and juicy burger.
What Should You Do if Your Grill Temperature Is Too High or Too Low?
If your grill temperature is not at the optimal level for cooking burgers, here are some adjustments you can make:
- Adjust the Burner Settings: Lower the gas flow for high temperatures or increase it for low temperatures.
- Use a Heat Diffuser: This tool helps to moderate the heat, creating a more even cooking temperature.
- Check the Grill Lid Position: Opening or closing the lid can significantly impact the grill temperature.
- Move the Burgers Around: Positioning burgers away from direct heat can help manage high temperatures.
- Let the Grill Preheat: Proper preheating ensures that the grill reaches the desired temperature for optimal cooking.
Adjust the Burner Settings: If your grill is too hot, consider turning down the burners to reduce the heat. Conversely, if the temperature is too low, you can increase the gas supply to raise the heat, ensuring that burgers are cooked properly without burning.
Use a Heat Diffuser: A heat diffuser can be placed between the burners and the cooking surface to distribute heat more evenly. This tool is particularly useful for preventing flare-ups and ensuring that the burgers cook thoroughly without charring on the outside.
Check the Grill Lid Position: Keeping the lid closed retains heat, which is beneficial for cooking burgers quickly. If the temperature is too high, opening the lid can allow excess heat to escape, bringing the temperature down to a more manageable level.
Move the Burgers Around: If some burgers are cooking faster than others, rearranging their positions can help. Placing them on cooler parts of the grill allows them to cook evenly and prevents any from getting overcooked due to direct flames.
Let the Grill Preheat: Allowing the grill to preheat for about 10-15 minutes before cooking helps achieve the best temperature for gas grilling burgers. This step ensures that the grilling surface is hot enough to sear the patties, locking in juices and flavor.
Related Post: